Friday, 11 April 2014

Each leaf

 
We're likely in for some rainy type weather which is more in keeping with the Autumn months. The weather has been so nice of late too. But I don't mind the rain at all.

 
My granny thrift squares are coming along nicely. I've also been doing a lot of practice with crochet enough I can read instructions and I want to try my hand at some delicate crochet edging. I've had a go at doing some dishcloths and potholders which I will show eventually.

 
I do like a good freshly baked basic scone. It is lovely with a cup of tea and a heaping of jam on top of the scone.

 One of my junk journals with a real vintage cabinet photo of two lovely friends, I purchased these gals from etsy in a group a while back. I am going to work in this journal for next month.


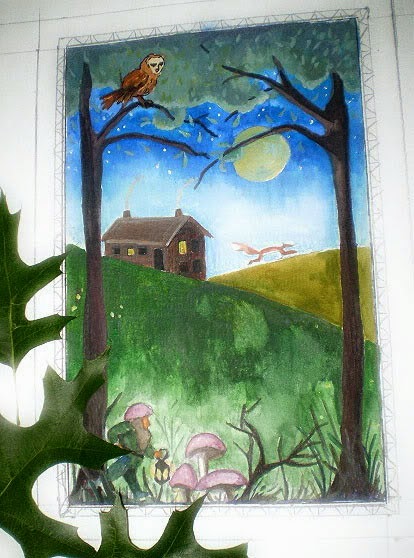
And a sort of an attempt at a folksy painting idea.


I played around with it a bit more for maybe a needlepoint design. I have been thinking a lot about needlepoint and migh try it one day!
 
Have a good time whatever it is you are doing. I'm off for some more crochet!

Thursday, 10 April 2014

Curious Imaginations

 
Come with me for a peek inside my sketch books!
 
 
There's always something I can use for inspiration. A handful of impatiens in a jug is good for simple ideas and keeps me practicing drawing from real life. A few moments to break down the simple flower shapes and colours give some ideas for future pattern work for who knows what. It's just thinking artistically.

 
There are pages with sketches and scribbles and nonesense notes to myself in the side.

 
And drawings for not only paintings but maybe something in applique or needlework or what about the border below, I think that could be a nice bead work item.

 
There's always something fairy which I love.


And maybe a self portrait.


This all comes about after walks outside and I dream imaginary things. I might pause to crouch down a little closer to think I see a door to a little gnome cottage in the stump of a tree, cracked just ajar for a gnome to peek through to see who is doing all that stomping about. 


Or I might spy a window closed in a fairy home while the fairy is away and be curious about what lays beyond the closed window.
All these dreamy ideas make their way into my sketchbook pages at some point. Then, just maybe I might get a painting done when the time is right too. Or I should just make the time for painting once again. It has been far too long.
 
I think, at a child’s birth, if a mother could ask a fairy godmother to endow it with the most useful gift, that gift should be curiosity.
-Eleanor Roosevelt.
 

Wednesday, 9 April 2014

Baked Cauliflower in white sauce


Baked Cauliflower in white sauce.
 

Cauliflower

1L milk

120 g butter

4 Tablespoons plain flour

Grated cheese

 
Pre-heat oven for about 180-200 degrees c.
 

Cut your cauliflower in chunks. Steam pieces until they are tender.

 
In large saucepan melt butter over medium heat. Sprinkle flour over the butter and mix together, trying not to burn anything. Add warm milk slowly and keep stirring until the mixture thickens. Once the sauce is nice and creamy pour sauce over the cauliflower to fully cover them and sprinkle over the grated cheese.
 

Bake for about 20-30 minutes or until golden brown on the top.

Frugal tip: You can make up powdered milk for this instead of fresh milk. Serve up with steamed vegetables.


Tuesday, 8 April 2014

Gold and green


 The unfornuate truth about hand work is that it does take time to do. The results, though, in the end are worth the time and there is the consolation of something to show for the time you did put into the work when you are done.


While out and about on my walks I am noticing sweet little details people put in their gardens. This home has some cute gourds place about in the garden for a whimsy look.

 
Ages ago I spotted a hare bounding around the streets and off into the distance. With hares in mind and white rabbits who are always late, I did this drawing using coloured pencils. I thought I might make it up into a needle work cushion as the bold lines lends it self well to the technique of needlepoint.
 
 
And there's always some sort of baking happening at home. Just in time for a cup of tea after a walk. 


I've been also puttering around cleaning up my craft supplies and sorting through things. I always find interesting tid bits I can't throw away and store them instead for future junk journals. 


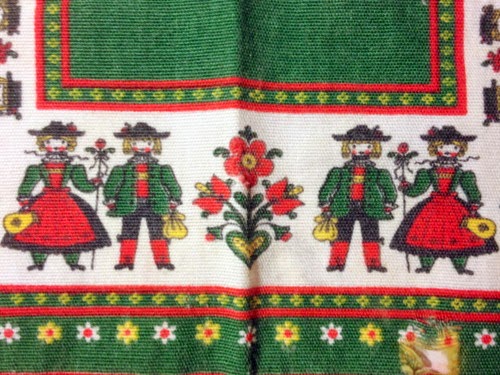
I found this tatty old napkin on one of my thrift store hunts. I have plans to salvage the borders as much as I can for a future project. You can see on the bottom edge some of the holes in the fabric. The rest of the napkin has good enough fabric to have possibilities for frugal thrifty crafts.
 
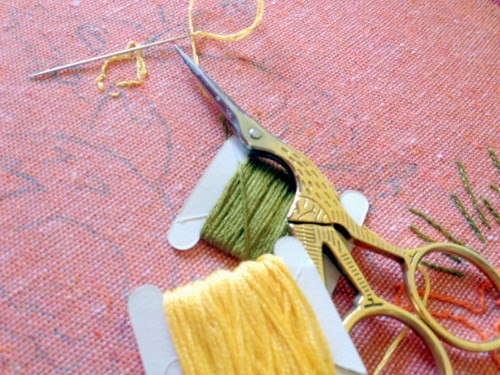
Now, I have some stitching to finish. Hope everyone is having a good day or evening.
 

If you hear a voice within you say ‘you cannot paint,’ then by all means paint, and that voice will be silenced.
-Vincent Van Gogh.

Monday, 7 April 2014

Home & Hearth


O Wild West Wind, thou breath of Autumn’s being,
Thou from whose unseen presence the leaves dead
Are driven like ghosts from and enchanter fleeing.
‘Ode to the West Wind’
Percy Bysshe Shelley, 1792-1822.
 
 
Day to Day
 
 
(My Great Grandmother)

As the days move further into autumn, I am anticipating the cooler weather, grey skies, and watching the leaves turn gold. The changing weather brings about different meal menus of hearty soups, stews, and roasted vegetables and meats. The type of menu that brings in old fashioned kind of smells from the kitchen.
As a child I remember my Great Grandmother (on my mum’s side) and her kitchen. She had an old wood stove in that kitchen and every Sunday, Mum would have us kids there to help cook Sunday dinner.  Mum, her mother, Great Grandmother and a Great Aunt would all be in the old kitchen cooking on that stove and the smell of roast Sunday dinner was always my favourite.  I remember the kitchen had no such thing as fly screens on the window, and it was always dark. I remember the kitchen hutch with all the dainty tea cups hanging from the hooks off shelves (We were taught to hang the tea cups facing all the same way when we cleaned up after dinner).  Times have changed but the Sunday dinner roast smell is still my favourite. And Autumn seems to remind me of those scents as well as those times.


There's plenty of time now for doing a lot more hand crafting. Roosters and hens seem an appropriate theme for a autumnal decoration on current linens.

 Pinks and peppermint greens are featuring a lot in the two tone block granny squares I am making. Each block will only have two colors, the main chocolate brown color and a bright color. As a reminder these are wools I brought from the thrift store and the color scheme is only what I have from what I brough that day.

 
My sketchbooks too, are filling up with ideas, inpsiring snippets, and practice; as I ponder future paintings.


Each day I journal in smash books ( new fancy modern word used for those old fashioned scrapbooks our parents and grandparents used to have. The ones where they put in their cards, and letters, and such), to fill up the pages and to find a home for all photos as well as other small items I collect during the day. 

Recipe
Rustic simple crackers


Ingredients:
1 ¼ cup rolled oats
¾ cup plain flour
½ tsp. bicarb. soda
½ tsp salt
Squirt of lemon
5 Tbs cold cubed butter
1Tbs brown sugar packed
3-4 Tbs milk
 
Method: 
In food processor combine dry ingredients, pluse for about ten times with butter. Add squirt of lemon juice or vinegar and then enough milk so the mixture holds together. On floured board knead a few times then roll out thinly. Cut and give a couple of pokes with a fork. Place on baking tray and bake in a moderate oven (around 375 degrees C) for about 12 minutes until lightly browned.
 
Home hints 


Flour: If you are not sure what flour is in which container a simple test is necessary. Add a teaspoon of flour to a glass of water. The Self-Raising Flour will bubble to the top. The Plain Flour will not.


“It's sad if people think that's (homemaking) a dull existence, [but] you can't just buy an apartment and furnish it and walk away. It's the flowers you choose, the music you play, the smile you have waiting. I want it to be gay and cheerful, a haven in this troubled world. I don't want my husband and children to come home and find a rattled woman. Our era is already rattled enough, isn't it?”
-Audrey Hepburn.
 

Friday, 4 April 2014

Autumn tones


While out and about in town I found this berry fabric for a couple of dollars. I found some tea towels to match and have plans for embroidering kitchen linens.
 
 
A search online and I found some vintage embroidery patterns to match the berry fabric and the tea towels. I've just about finished up some other home kitchen items I have been working on and I will show them soon. It doesn't cost the earth to begin small house hold items like these. Pillow cases, tea towels are always so cheap if you look around, even for the better quality type ones. Potholders and dishclothes also are very cheaply done and are easy enough for even beginners. If you are crocheting potholders and dishclothes, like I intend to; always use 100 % cotton thread as it will be much easier to wash the items and they can withstand a lot of hot water.
 
For crochet dishcloths and potholders there are free patterns at yarnspiration
 
Online there are plenty of free pattens for vintage embroidery to keep anyone happy, here are some sites to begin with:
 
Free vintage patterns at Needlecrafter
 
Sentimental Baby has some vintage patterns a mix of embroidery, cross stitch, crochet, and knit.  Sentimental Baby
 
If you search Pinterest there are more links to various sites as well.

 
I've also been doing baking. I couldn't find the cookie cutters so I made do.


A current thrift store find was this small oil lamp. The pin part is broken but I like it and it goes with my other oil lamp collections.

 
And there is always time to stop and rub Mister Simba's tummy when he asks. (the toy cow he has had since he was a puppy. The ears are missing, the tail is long gone, and the cow is knawed through. We've tried to convince him to try new ones exactly the same but he isn't fooled.)

I hope everyone is having a fine day or evening where ever you are.

Linking to:


Thursday, 3 April 2014

Stenciling tips


Always be careful when using sharp items. Cut away from you.
 
Right away I will warn you: The biggest mistake in stenciling is too much paint on your brush. If the brush is not dry enough the paint will seep under the stencil, causing the edges of your design to be fuzzy rather than crisp. The centre of the stencil will be heavy with colour, which makes an undesirable finnished affect.
 
Step 1: Position the stencil sheet on the object and tape it on each corner so it won’t slip Hold your brush in an upright position so that when you dip the end bristles into the paint it coats evenly Dip the brush into the pat and then tap it up and down on newspaper to remove all excess paint. The paint should go on almost dry. A dry brush will achieve a clean, sharp design. The paint on your brush should feel dry to touch.
 
Step 2: With the brush straight up and down tap the paint onto the area to be stencilled. This motion is called “stippling”. If  you use a hard pounce the dry brush will cover the area and you will avoid smeariing and bleeding paint under your stencil. Tapping up and down with the brush in a pouncing motion allows you to cover the area so that it becomes more dense as you continue.
 
Step 3: When finished carefully lift the stencil sheet to check the design. Always work one section of the design at a time. Letting each section dry.


For my stencil design that I drew I used rustic flowers as inspiriation. I simply used printer paper and carefully (and I do mean carefully) cut away the design I had drawn. I cut away the paper where I wanted the paint to be. With cautious use I was able to use the stencil four times on a project and still finished up with a useable stencil for other projects.  Of course you can use an old cereal box or other type of stiff card if you want a more durable stencil.

Wednesday, 2 April 2014

Old fashioned favourites


Jam Drops


Ingredients

125g (4oz) butter

¼ cup sugar

1 egg

2 teaspoons honey

1 cup self –raising flour

Pinch salt

Jam

Method:

Cream butter and sugar until light and fluffy; add egg and honey, beat well, sift dry ingredients, add to cream mixture, mix well.
Roll teaspoonfuls of mixture into balls, put on greased oven trays, with finger, make small indentation in centre of each biscuit; put a ¼ teaspoon of jam into each indentation. Bake in moderate oven 12 to 15 minutes or until a light golden brown.


Makes approx 30.


"I am not saying this because I am in need, for I have learned to be content whatever the circumstances. I know what it is to be in need, and I know what it is to have plenty. I have learned the secret of being content in any and every situation, whether well fed or hungry, whether living in plenty or in want."
 
- Philippians 4:11-12

Tuesday, 1 April 2014

Autumn rains


We've been having a lot of rain this month and I find it best to stay in doors and craft. I'm using a lot of my scraps up in various projects and have a few crafty frugal things ready in the making.


My granny squares are growing slowly but surely as I do a few a day.

 
Each day I am returning more to embroidery. I have a whole kitchen set almost done and I'm pleased I didn't have to buy any items new as most of the things I already had in my stash. This applique rooster was a kit I have had forever and now I finally made it!

 
Of course there is also time for some paper crafting as well. There's nothing I like better than to cozy down on rainy days with a crafty project, and looking through craft books for inspiration.
 

“Home is the nicest word there is.”
-Laura Ingalls Wilder.


Saturday, 22 March 2014

Fringed flowers

To make these fringed flowers you will need the following:
 
Ingredients:
Paper strips. I used printer paper scraps for mine. But you can use any strips you have from your paper stash.
A jar lid of some kind for a template. A smallish one is better about 2 inches.
Acrylic paints. Or scrapbooking sprays of your choice. Or Inks too.
Paint brush.
 
Method:
 
 
To begin, place your paper strips around your jar lid. Start in the center and work your way around. First place a dot of wet glue on the base of the lid. Then the top of the paper strip. Continue to add a dob of glue to hold each strip in the centre. Don't use a glue gun as this makes the centre too raised up.


Once finished gently pull off the flower from the lid.

 
By this time you can paint your flowers. Add your bling centers as well. I used flat backed pearls, around 2mm. Once dry cut into the paper strips to start fringing. Cut as far down into the center as possible. You may find it is best to cut the strips a few times to get a nice looking fringe. 


And then fluff up your petals softly and you're done!

 
Have a nice day everyone.

Monday, 17 March 2014

Floral scents


Keep a reminder of Summer at home with the scent of potpourri. Potpourri recipes are infinitely variable and mixtures can be sweet, citrus or with strong spicy accents. Scented sachets, bags and little cushions offer a host of possibilities for using potpourri and the mixtures can also be displayed in pretty bowls.


If you have a microwave you can dry some of your ingredients quickly to make potpourri. 
 

Ingredients:
 
Paper towels.

Heavy microwavable plate or dish.

Blooms of your choice.


Method: 

Pull apart the blooms and place the petals on paper towels. You can stack a few paper towel layers together, I used about three or four together. Place the heavy plate on top of the top layer paper towel. Depending on your microwave the time will be different. For mine I used a minute or so (maybe about two mintues) on high. Checking regularly to see how the petals were drying. You’re aiming for a papery feel to the petal blooms when they cool down. The ones on the bottom layer might need a bit longer because it does ‘steam’. Test and try until you are getting the finished dryness.


Mix your bloom into a nice scent. I used Rose petals. Calendula. Mint. Rosemary. Scented Geranium. Thyme. And Heliotrope in my mix.


When finished display in pretty bowl.


Or, make up lovely little sachets from remants of old lace, vintage doileys, and other materials for gifts or to place in your clothes drawers. If you don't want to make a potpourri the petals dried in this way can also be used in pressed flower arrangements.
 
I hope everyone is having a good day!