Showing posts with label projects. Show all posts

Friday, 14 December 2018

Floral Gingham Applique


The floral gingham appliqué pattern first appeared in a late 1938 newspaper. Even though I am looking at 1939 timeline, patterns from the year before are still something I can use in the time period.

The pattern it self is for needle turn appliqué as at the time the heart and bond we have today wasn't available. The best way to approach the needle turn appliqué with this type of design is to cut paper smaller than the material and then baste the fabric around the paper. Pin the pieces to the fabric base (tea towel) and then appliqué using very small slip stitches around the out side edge. The embroidery is done last.  For the embroidery I used DMC 310 Black using three strands through out.

If you haven't the time or patience for paper basting and needle appliqué, then use heat and bond. When doing this type of appliqué I like to use a heat n bond that is a lite (brand) which makes it suitable for embroidery. But if you don't want to mess around with reversing the pattern, go with the traditional needle turn appliqué.


The article had instructions at the bottom of the illustration which read: Those readers who wish to embroider tea towels will find this design most useful. The checks marked on the flowers indicate the checks of the  gingham. Any odd scraps may be used. Plain colours are also attractive and can be used with very good effects. A heavy thread is advisable for the working.  Breakfast cloths or luncheon mats look well decorated with this design.

I used the pattern on a yellow check tea towel and scraps from my stash. I also used a fade away pen to draw in the pattern for the embroidery design as a guideline for stitching.


I hope every one is having a good day or evening where ever you are.

Tuesday, 26 June 2018

Hankies for gifts -1939


I found this handkerchief edging in a November 1939 Australian women's magazine. It seems a bit complicated but the pattern is doable for someone like me with little experience in crochet. I tried doing the edging when I had a flu and there was a couple of attempts to figure out the pattern. I'm not really sure if I managed to get the pattern right but the finished edge looks nice enough. 

The finished handkerchief was teamed up with a hand painted greeting card and I used the greeting card painting as an embroidery on the handkerchief. For the embroidery I used the ever popular crayon tinting technique that was popular in the '30's for the embroidery.


(Note: The crochet stitches are English/Australian. American crochet stitches are different. I have a chart on my blog in an old post to translate stitches: Here)

Use fine handkerchiefs with a narrow hem and work over the hem into actual holes of hemstitch.

Abbreviations: Ch, chain; dc, double crochet; tr, treble; pic, picot ( 3 ch, 1 dc back into first) spl, single pic loop (2ch, pic, 2 ch, pic); H, hole of hemstitching. If plain linen be used, roll edge and close dc all round, then call every dc an h.

Double picot Edge:
1st row: 1 dc into any h, * 3 ch, miss 1h, 1 tr, 3 ch, 1 tr into next; miss 1 h, 1 tr, 3 ch, 1 tr into next; 3 ch, miss 1 h, 1 dc into next; 5 ch, miss 1 h, 1 dc into next, Repeat from * all round.

2nd Row: 1 dc into 5 ch loop, * 3 ch, 1 tr, 1 spl, 1 tr into 3 ch between first pair of tr; 1 tr, 1 spl, 1 tr into next 3 ch between next pair of tr; 3ch, 1 dc into 5 ch loop repeat from * all round. 

I hope everyone is having a good day or evening where ever you are.


Friday, 7 April 2017

Plain and Fancy


After the heavy rains we had from Cyclone Debbie up North, the cooler weather came in and we've been having some blustery days. The change of season is definitely here now bringing in Autumn. 
With the changes, I've dusted off my blog and added a simpler layout theme.

I've been puttering around the house using up my stash and trying not to buy anything new. I've also been going through a lot of my boxes which are packed up and seeing what I want to keep for when I move into my own place. I think the hardest things to decided if I want to keep them or not is books. I have a lot of craft books and other books I like to use. Although some I never actually make any of the items from or read much, they are just there for mostly inspiration. 


A long time ago my Aunt, who I live with, gave me a large tin full of old buttons. Some of the buttons are fancy and some of them are plain. Most don't like the plain buttons but I find uses for them.


I've been using the plain buttons on vintage hanky sachets and storing them in amongst linens. The hankies were given to me, or I found them at the thrift store in packets which were about 50 cents! The ribbon also came from my stash. I used potpourri from flowers and herbs from the container pots, so these make really sweet, vintage and frugal items. They also would make a nice gift. 

To make:

1: I use the whole hanky as I can't bring my self to cut them up. 
2: Then I fold them so they look like an envelope. 
3: Then on the back where the flaps are folded I slip stitch along the flaps to sew them down. 
4: On the front I sew a couple of buttons and add a ribbon bow.

I'm sure there is an easy way to make these without sewing, but that is how I do them.


We made these cheesy crackers to see how they were, ours were a little soft after cooking but still tasted fine. The recipe didn't use many ingredients and yet they were still tasty.


I hope everyone is having a good day or evening where ever you are.


Monday, 13 March 2017

March days


The weather has changed here to bring in Autumn. There have been some storms about which will likely bring in the cooler weather, I don't know about anyone else but I'm looking forward to Winter. The rain has been good for the container pots.


While it has been raining I've been working on new items for an April market stall. Tea towels, of course, and some more other items to sell as well.


In February the Toowoomba Simple Living group held it's first work shop for the year. We were shown how to make pineapple jam, very sweet but yummy.


I came home with a few goodies from the swap table, including an Aloe Vera plant. The Aloe Vera came in handy as I got sunburnt at the Cabarlah Markets. I had an interesting day and will likely do another stall at the markets as well.


I hope everyone is having a good day or evening where ever you are.

Saturday, 24 December 2016

Holidays


I just want to wish everyone a Happy Holiday, or Merry Christmas, or how ever you celebrate this time of year. Keep safe in the New Year and I hope to be posting again soon after the New Year. 

I also want to thank everyone who has left a comment through out this year, although I don't always reply, I do read, and I appreciate every comment. 

My surgery to help fix my voice also went very well. I have a good clear volume and can speak longer without breaking. Although the voice is a little raspy with the healing, I'm happy with the out come.


Have a good day or evening where ever you are.

Tuesday, 6 September 2016

this and that


Spring is well and truly here.  We've had a bit of mix bag when it comes to the weather but it has been mostly glorious. I've been planting away in my tiny container garden and it is coming along nicely. The tomatoes are turning red and it looks like there is more on the way. Not bad for a freebie plant I picked up off the swap table at the Simple Living group, the plant I picked up in the winter workshops and dad said it would die. I also brought these 'mums mostly because of the cute little water can pot but mostly because they were half price at Woolies.


At home we've been trying to use up what we have with the food as we don't seem to go through it quick enough. So we made up some fritters to use up excess ham and such. The burnt ones are also yummy. 


I've also been pottering away at the work desk. I agreed to do a table at a craft stall in October. It'll be my first craft stall and I hope to have enough. You'd think I'd have more but as I do things they end up going so I'm not left with much. Besides I like to do things fresh and make more new things, keeps me interested that way. I'm hoping to have a quilt on the table too, but I don't think there'll be enough time for that.
I found the pattern for the brooch lady and bird on line, a vintage pattern which says to make them up in applique and add beads and bows. I used crayon tinting and added beads and bows as suggested. I backed them with felt and added a safety pin for the brooch pin. I think they turned out nice for something that uses up my material scraps. There be a few on the stall table for pennies...well, cents.


I hope everyone is having a good day or evening where ever you are.

Sunday, 24 April 2016

Scented box


Scented fabric lined box

Materials:

Craft box or recycled box of choice.
Fabric.
Potpourri of choice.
Thin cardboard. Use recycled board from cereal boxes.
Thin fabric batting. Old tea towel or dishcloth will work for batting. I used an old flannel blanket.
Craft glue suitable for material.

Optional: Memento Ink color of choice.

Method:

To begin trace the box shape inside onto paper for your template.
From the template cut one from thin cardboard. 
Using the template trace around on batting and fabric leaving enough to turn in the fabric around the cardboard.
Glue your batting to the cardboard. Snip in around the edges to smooth out the turning if your box is shaped. If it is square or rectangle simple turn in the edges paying attention to miter the corners without bulk. (Cut across the corner and turn in the edges to give a mired look).
Take your fabric and with wrong side facing the batting, glue into place, first add a a thin line of glue to the batting and then glue the fabric to the back by turning the edges of the fabric towards the back of the thin cardboard. Be sure to leave a gap to fill with potpourri.


To fill the shape, a bowl and spoon will be helpful. A funnel will also help but I didn't end up using mine. Spoon in the potpourri to fill the shape. Don’t over stuff. Keep the filling thin but padded. Fold over the opening towards the back of the cardboard and glue into place.

If preferred you can ink the edges of the fabric. I used Memento Ink in Lady Bug.

Cover the back of the thin cardboard with glue and glue into place. Press down around the edges and in the center to make sure the cardboard adheres well to the bottom of the box.

Your scented box is now ready to hold any items you like. 

Useful Links: 


I hope everyone is having a good day or evening where ever you are.

Thursday, 14 April 2016

Grandma's apple

Apple crochet dishcloth


This crochet dishcloth is very easy to make, but you do have to pay attention to the rounds to make the stitches consistent to the pattern. It's more an 'apple slice' if you use white and green or red color for the edges. Another nice idea is to just crochet the apple all in green or all in red so the apple doesn't look like it is sliced. The loop would look nice in a wood color and the leaf a different green to the apple. But if you only have one green color yarn that will do.

Please let me know if there is a mistake in the pattern and I will try to fix it.
Crochet stitches are American stitches.
For Australian crochet stitches are here.


Note: Ch 3 at beg of rounds or rows count as a DC

Crochet hook I used was 4 mm or G Hook. I used Lincraft brand 100% cotton yarn with is an 8 ply. 

Round 1: Ch 3 11 double crochet in ring. Join with sl st to top of ch 3. =12 dc.
Round 2: Ch 3. 1 double crochet in same space as last sl st. 2 Double Crochet in each double crochet around. Join with sl st to top of ch 3. = 23 Double Crochet.
Round 3: Ch3 2 double crochet in next double crochet. * 1 double crochet in next double crochet. 2 double crochet in next double crochet. Rep from * around. Join with sl st to top of ch 3.
Round 4: Ch 3. 1 double crochet in next double crochet. 2 double crochet in next double crochet. * 1 dc in each of next 2 double crochet. 2 double crochet in next double crochet. Rep from * around. Join with sl st to top of ch3. = 48 double crochet.
Round 5:  Ch 3. 1 dc in same sp as last sl st. 1 double crochet in each of next 3 dc. * 2 double crochet in next double crochet. 1 double crochet in each of next 3 double crochet Repeat from * around. Join in with sl st to top of ch 3. = 60 double crochet.
Round 6: Ch1. 1 sc in each of next 3 double crochet. 1 half double crochet in next double crochet. 1 double crochet in next double crochet. ( 2 double crochet in next double crochet. 1 double crochet in next double crochet) 4 times. 1 half double crochet in next double crochet. 1 single crochet in each of next 6 double crochet. 1 half double crochet in next double crochet. 1 double crochet in each of next 2 double crochet. 2 double crochet in each of next 3 double crochet. 1 double crochet in next double crochet. 1 half double crochet in next double crochet. 1 single crochet in next double crochet. 1 half double crochet in next double crochet. 1 double crochet in next double crochet. 2 double crochet in each of next 3 double crochet. 1 double crochet in each next 2 double crochet. 1 half double crochet in next double crochet. 1 single crochet in each of next 6 double crochet. 1 half double crochet in next double crochet. ( 1 double crochet in next double crochet. 2 double crochet in next double crochet) 4 times. 1 double crochet in next double crochet. 1 half double crochet in next double crochet. 1 single crochet in each of  next 3 double crochet. Join outer second color with sl st to first single crochet. 74 sts. Break main color.
Round 7: With Outer Second color, ch 1, 1 single crochet in same space as last sl st. 1 half double crochet in next single crochet. 1 double crochet in each of the next 4 sts. ( 2 double crochet in next st. 1 double crochet in next 5 sts) 4 times. 2 double crochet in next st. 1 double crochet in each of next 4 sts. 1 half double crochet in next st.1 single crochet in each of the next 2 sts. 1 half double crochet in next st. 1 double crochet in each of next 4 sts. ( 2 double crochet in next st. 1 double crochet in each of next 5 sts) 4 times. 2 double crochet in next st. 1 double crochet in each of next 4 sts. 1 half double crochet in next st. 1 single crochet in next st. Join with sl st to first sc. Fasten off.
  
Hanging Loop
With 2 strands of loop color held together, join with sl st to top of Apple. Ch 12. Join with sl st in same sp as first sl st. Fasten off.

Leaf
With Leaf color, ch 12
1st row: 1 single crochet in 2nd ch from hook. 1 half double crochet in next ch. 1 double crochet in next ch. 1 treble crochet in each of next 5 ch. 1 double crochet in next ch. 1 half double crochet in next ch. 3 single crochet in last ch. Working across opposite side of ch, 1 half double crochet in next ch. 1 double crochet in next ch. 1 treble crochet in each of next 5 ch. 1 double crochet in next ch. 1 half double crochet in next ch. 2 single crochet in last ch. Join with sl st to firs single crochet.
Fasten off.
Sew leaf to Apple near hanging loop.


If desired add seeds in the center by embroidering seeds either in bullion stitch or lazy 
daisy stitch.


I hope everyone is having a good day or evening where ever you are.

Thursday, 31 March 2016

Patchwork days


 My, it has been a while since I last posted. I took a little bloggy break as I did lose my blogging voice, if there is such a thing. But a 'holiday' is a good change. The weather has turned into Autumn now and the days are warm but cool. We've had sun and rain which brings in the Autumn. I've been at home and at mum and dad's pottering around. I attended the Simple Living Toowoomba sausage making workshop which was very informative. 

I've been doing a lot of sewing as well, at some point I hope to share the apple dishcloth crochet pattern, isn't it cute?


At home, here, I finally have some small cutting from dad's garden to start my garden. The cuttings have grown up, there's Rosemary, Thyme, Parsley, Mint and Basil. So far they are growing nicely in their pots. It's a small start but a start. Eventually I'll bring over some flowers too.


We are settling in at the new place and it has been interesting so far. My Aunt, who I live with, is a bear collector. She has all her bears out in her room and you can tell she's happy to see them all again.


And of course there is painting. Scribbles in a junk journal art book.


I hope you are all having a good day or evening where ever you are.

Thursday, 26 November 2015

Creating at home


The weather has been hot and outside is not really the best place to be. Although I did venture to town to have a look at the CWA mini market. Surprisingly I never brought anything, probably because I have been working on projects at home. I did enjoy having a browse through the tables.
I've finished up face washers for my driving instructors mum who wanted them for the grand kids. We picked up a dozen cute face washers for next to nothing and the yarn cost very little, around $4. I don't know about anyone else, but I always liked a face washer and a  piece of soap for a gift. Very useful I think. I'll give the instructions for the edging in another post. Speaking of driving, apparently I can try for my drivers licence in February.  Where did the year go?


With the projects I had to do, I haven't had much of a chance to catch up on sending out my mail. I've received some fantastic letters from around the world: America, Canada, Hungary, and here at home. I really enjoy snail mail, does anyone else send letters?


I've also been neglecting my painting, the last art I did was these miniatures for necklaces. It's time to pull out the paints again.


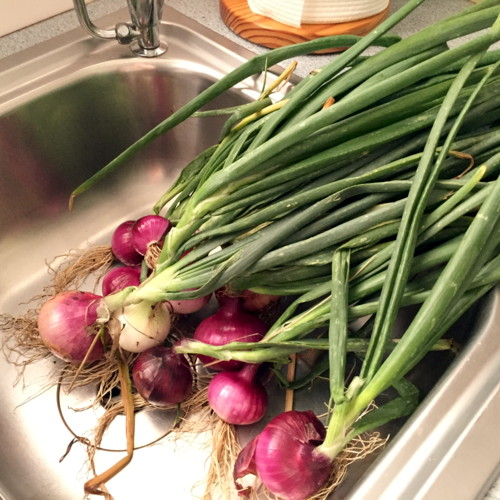
In the garden, we've had a bumper crop of red onions. I think it's time to try out red pickled onions.   


I hope everyone is having a good day or evening where ever you are.


Tuesday, 20 October 2015

Flower Days


We had really lovely weather today, there was a slight breeze and with out it I think the day would have been much warmer than it was. You can feel the change in the air as Spring is fading to make way for early Summer. 
I took a drive with Dad to one of our local nursery's as Dad wanted to by some more yellow roses. He said this local nursery is one of the better one's for price and for the fact the plants are out doors. He doesn't like buying plants in stores. 

I came home with a Tansy plant. I have a few potted plants for my self for a dyer's garden I hope to have and use eventually. Tansy gives gorgeous shades of subtle green and yellow. The Tansy I brought is the common Tansy, the herb. Not the harmful Tansy Ragwort which is very different in appearance.


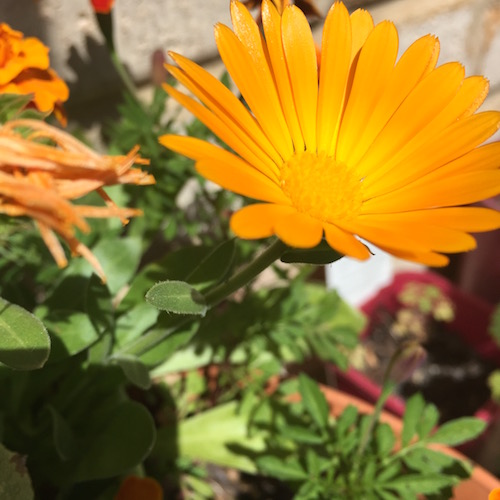
The roses have been blooming and I've been picking flowers and drying them. I am playing around with making tea blends. This one is Green tea, Calendula, Roses and Jasmine flowers. I know these plants haven't been sprayed so I am okay with drinking them. Always be cautious about ingesting plants, no matter how benign. Be especially cautious when pregnant, taking prescription drugs, around pets, and small children. In short: Be safe.


There's been some slow work on the crazy quilt. It's a slow thing, more slower now the weather is warmer. This is a good winter project.


I've been working on a different technique with my art, using coloring pencils. If anything it is relaxing to do.

I also changed my blog look and added new links to the pages beneath the header. 


I hope everyone is having a good day or evening where ever you are.


Sunday, 11 October 2015

Market day


I've been quiet of late pottering around at home and have been a bit neglectful of my poor blog, but I hope to fix that and post a bit more.
The weather of late has been a mix bag of warm and windy which is not a good combination for the fires that have been around. But at least the wind has been keeping the days mostly cool. I think summer is going to be a hot one.
Last week I received an email to let me know about the new workshops for the Simple living group, the co-coordinator, Margy, also sent information about a mini homeschool market held at the Range Christian fellowship on the week end. My aunt and I headed off early to have a look around at the stalls. It was a good day to wander around to look at the stalls as the day before was so windy! It was still windy but not as windy.


I came home with two pressed flower bookmarks, yes I know I could make them my self but I like to help kids who are making their own items to sell. The book marks have scriptures on them with spelling mistakes :):
So we fix our eyes not on what is seen, but on what is unseen, scince (since) what is seen is temporary, but what is unseen is eternal. 2 Corinthians 4:18

I can do all things through Christ which (who) strengtheneth (strengthens) me. Philipians (Philippians) 4:13

I also brought some clay charms from When Laura Meets Clay: Whenlaurameetsclay.etsy.com. The book marks and the charms items will go well in snail mail letters.


I've also been pottering around in the garden and preparing potpourri mixes from the dried flowers I already have dried. My room smells like a flower garden.

There's been a lot of snail mail happenings too. I made some cards and postcards out of old magazines for a swap.


My art desk also has a lot of paintings going on. Just small ones for now.

We had a lot of produce from the garden too. We pickled beets. Picked silverbeet and more kale too. Over the last year or so dad has been planting out a few small garden items to grow in beds. The old favourites most kitchens like are being grown. We have three raised beds that are giving us plenty to use in the kitchen. Which proves you don't need big to start with.


I hope everyone is having a good day or evening where ever you are.