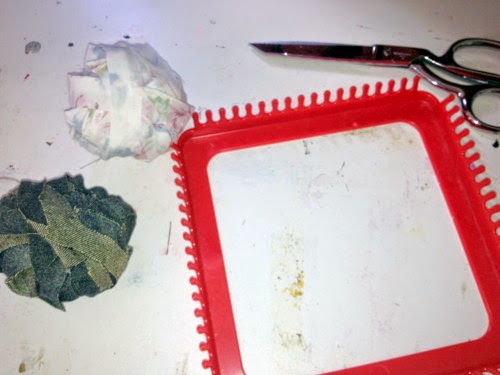
Nanna Chel over at Going Grey and Slightly Green asked me in comments how I did the woven potholders, so without much ado here is a ...hopefully...simple lesson for all to try.
To begin with you will need a potholder loom. The one I use is by KLUTZ. You could easily make your own using an artist stretcher frame and some nails. I'm sure a google or pinterest search would give a good idea how to go about that. As well, some stiff cardboard with notches cut into the sides and tops can also be useable.
My loom makes about a 6 inch potholder when finished.
To begin with you will need to enough material for your weaving. In weaving terms the parellel threads (In this case fabric) is called the warp and the threads that run across (what you weave over and under) are called the weft.
Take your material that you have cut up in one long continuous strip. I do this by just cutting narrow strips going around and around the fabric until I've enough of a very long strip of fabric. Likely not the right way to do it but that's what I do. I think it should be properly cut on the bias to make a continious strip that doesn't fray as much. There's a video for preparing fabric strips on the bias: here
To start, tie the strip of fabric to one peg on the loom.
Run this fabric called the warp, down, wrap around one peg at the bottom and come back up. At the top wrap around TWO pegs.
When you get to the end of your loom with your warp thread, tie the thread on ONE peg and cut the end, leaving a tail of fabric.
Have enough weft fabric strip to weave your entire potholder. Start by going over and under your warp threads. Pull ALL the fabric through until you have some left at one end where you can tie it on one PEG. I usually begin next to where I ended my warp thread as this will now be the holder for the potholder when finished.
When you weave your first row, your next row will be opposite of over and under. Remember to go around TWO pegs from now on until you reach the bottom where you will tie off around ONE peg.
Once all your weaving is done, you will now need a crochet hook. One at a time lift off the loops around the two pegs with your crochet hook and make an edging of single crochet by drawing the crochet hook through the loops. If this is not clear enough instructions this youtube video of finishing a potholder loom will help as it is the same thing.
In this picture you can see the loops taken off the pegs and a crochet edging of single crochet is finishing off the potholder. When you get all the loops done, you will have two strips of material at the corner of the top to make a holder for your potholder. At the bottom you will have to two strips as well where you ended, weave these in.
And now, you're all set for some fancy cooking with your woven potholders.
This is how I do the woven potholders. As I learn more about the technique my method will likely change to make a better finish, but for now, this is the method I do.
Hope everyone has a good day or evening where ever they are.


That is a great tutorial, Shiralee. Now I wonder where I can buy a loom as they don't seem to be on ebay. Did you buy it at Spotlight? I had a look at the loom I bought a while back and have never used and it is a butterfly loom. It is the small one and I wondered if I could weave a potholder on that. Years ago I used to do the nylon placemats on a loom with nails but I think I would scratch myself these days. Thanks so much for going to all that trouble.
ReplyDeleteWhat a wonderful idea for recycling some of my old shirts. Thanks for the tutorial it seems very clear and easy to follow. Now I just need to locate a loom
ReplyDelete