Friday 31 July 2015

Floral charm


This is a very frugal and simple lesson in how to make a tea cup bouquet of your own to pretty up your home. You will need a tea cup and saucer of your liking. Then gather a handful of small flowers and foliage to match your bouquet. Some people like to add florist foam or chicken wire in the bottom of their containers to hold the flowers, I just let the stems of the flowers hold everything in. Add some water in the bottom of the tea cup to begin with. 


The next step is to take off all the foliage that will sit in the water. Then take your small largest flowers you have and arrange them in the teacup first. Tea cup bouquets are dainty, your flowers and foliage should match the dainty quality.


Next add in your foliage until you are happy with the look of how they are arranged. Herb foliage can be used if that is all you have.

Then begin to arrange any smaller flowers you have around your bouquet. I used some small white climbing roses we have growing and some alyssum.


Before you know it you will have a easy tea cup bouquet you can admire. Just before the blooms fade I take the flowers and press them or dry them for pot potpourri. I also save the foliage too for potpourri.
If you don't have access to real flowers dollar store silk flowers work just as well. If you add a bit of blue tack or tiny amount of glue dots to the base of the tea cup just to hold the tea cup but enough to pull apart later, you can give this as a gift and they can reuse the tea cup.


I hope everyone is having a good day or evening where ever you are.

Linking up to:
A Wise Woman Builds Her Home


Thursday 30 July 2015

Old fashioned


The weather of late has been really enjoyable, along with the garden displays from various houses as I finally get into starting my walking again. I'm really loving all the pretty flowers coming out now. Spring is very soon.


I've been decorating envelopes and packing up small goodies to send off. I always hand write my letters even if my hand writing is awful I think it is still readable. One letter is to America and the two other's are to my Aunt's. They live just around the corner ( it will be interesting to see how long it takes the letters to get to them...if they get there at all!) but I think they'd like something nice in the mail box, don't you? Do you send letters? Why not start sending a card, a note, something for a cup of tea or something sweet if they like that. Even family would like something snail mail.


I hope everyone is having a good day or evening where ever you are.

Wednesday 29 July 2015

Pizza Base


The weather of late has been really lovely, a little chilly in the morning but it soon fines up enough with all the tell tale signs spring is just around the corner. In the kitchen we have been enjoying home made pizza using fresh herbs from the garden. I first learnt this recipe at the Simple Living workshops when they were doing cooking lessons. It is still my favorite recipe from those lessons, along with the curried sausage recipe.


PIZZA BASE


1 1/3 cup Plain Flour
½ teaspoon salt
1 dessertspoon sugar
1 teaspoon yeast
1 tablespoon olive oil
½ cup warm water
Cooking spray

METHOD

PREHEAT OVEN TO 180 degrees.

Combine, flour, salt, sugar & yeast into a large bowl, mix well.
Pour oil & warm water into dry ingredients.
Use a flat blade knife to mix into a ball and kneed into dough while still in the bowl.
Lightly flour bench, turn out dough using a rolling pin roll out to desired size or flatten with hand.
Don’t overwork the dough, roll lightly. The less handling the better the results.
Lightly spray tray and place dough into tray and add toppings. Lay pizza flat.
Cook for approximately 10-15 mins.

TOPPINGS:

PIZZA
Spread base with pizza sauce or BBQ sauce or tomato paste with mixed herbs. Top with meat, pineapple, ham, bacon, chicken, salami, onions, cheese sun-dried tomatoes, mushrooms, or create your favorite pizza

SWEET PIZZA

Tin apples, stewed fruits, brown sugar, cinnamon, jam coconut, muesli, nutella, sultanas or design your own combinations.

I hope everyone is having a good day or evening where ever you are.


Monday 27 July 2015

Nursery Mother

MOTHER GOOSE BABY CRIB QUILT
Tutorial


As promised here is the pattern and instructions for making the Mother Goose baby crib quilt. This quilt is very easy to put together as it uses large squares for the background and simple applique, and easy embroidery. 


You will need:
Sewing thread
Heat n Seal (Iron on bonding material) – Lite
Fabric scraps. Cottons. Fabric can be what ever you have on hand. Old dresses. Baby clothes. Pillow cases. Sheets. 
Batting. I used an old flannel sheet.
Backing fabric. Once again, bed sheet.
Embroidery needle.
Embroidery thread.

Directions:

Step 1:
Cut your fabric scraps into 6 ½ inch squares. Find a space to spread out your squares ( the top of a bed works fine). Arrange your squares as you like using five squares across and six squares down ( total of thirty squares). Sew your squares one at a time, right sides facing to make a row of five squares across. When sewing use the same seam allowance for all your seams.

Press your seams with your iron. 

Sew your rows right sides facing to join them, the seams should ‘lock’ in together so that your squares are aligned corner to corner at the front. Sew six rows. (You can do seven rows to make a longer crib quilt).

Press work with iron.

Step 2:

Applique with Heat n Seal:
Each shape on the design needs to be cut out and using heat n seal instructions on the back of the packet cut desired shape needed. The steps for heat n seal usually are to pre heat dry iron to setting wool. Cut Heat n seal to desired shape of material or motif ( For small motifs I find it best to draw the motif on the paper backing, cut a square of material larger than motif and cut out the motif following the drawing lines.
Lay heat n Seal paper side up on the wrong side of material (All images are reversed). Guide the iron evenly across paper side of fabric. Peel paper backing and place material adhesive side down (shiny side) and guide iron evenly across material to bond. When bonding material, first ‘tack’ shapes down by pressing lightly with an iron so they don’t move, if you pin shapes, use glass head pins so the pin heads don’t melt and ruin your work.

When using heat n seal all your images once you bond the material is in reverse.

Needle turn applique
If you are using needle turn applique, cut all shapes out in paper. Allow for a seam allowance on your material to turn your material under your paper shapes. Use invisible stitching to stitch the motifs down, pulling out the paper before you stitch around all of the motif. Leave a small enough gap to pull the paper out and stitch the gap closed.

When using any needle turn applique method your image will not be reversed.

Press work with iron.

Embroidery:
Detail of the embroidery. using simple stem stitch
and thread matching the fabric.

All motifs have been outlined in embroidery thread, using three strands of embroidery thread and simple stem stitch. You can stitch right on the outline of the motif if you like, but I like to draw a line inside the image and stitch on the drawn line.


Press all work again with iron.

Step 3: 
To layer your quilt first place backing material right side down. Backing material should have enough fabric to turn for binding. Place batting down, batting should be the exact size of the quilt top. Place quilt top right side up on top of the batting. To begin quilting you can simply sew around the inside of the quilt squares using a ¼ of inch. For my baby quilt I didn’t do all of the squares. I did though made sure I stitched all the corner squares. And stitched around the entire quilt to hold the quilt down more securely. 


Step 4: 
The backing fabric is folded up into a narrow
 hem to
bind the quilt.
Then I top stitched a very narrow seam
all around.

Fold your backing material to bind your quilt. Pin the binding to hold into place as you sew and top stitch all around the binding using a very narrow seam. You can also use invisible stitch (or blind stitch) to attach the binding to your quilt, this will make sure the stitches can’t be seen.

Press all work again with iron.


The image above is the mother goose pattern I used. All the detailed is done by using embroidery stitching by hand. Use stem stitch through out and french knots for Mother's eyes. 


The last pattern is a detailed cutting plan for when you are cutting your shapes out for applique. There is a little bit of an overlap of seam to help bond all the shapes together. If you click on the image these should print out to A4 exactly. If you want a larger image take the print out to be photocopied to a larger size. Remember when using heat n seal all the images will be in reverse. On my quilt I also added in some fluffy clouds and around the quilt I appliqued hearts in various sizes. You could also hand quilt some hearts in the squares too.


I am linking up with Strangers & Pilgrim's 

Strangers and Pilgrims on Earth


Wednesday 22 July 2015

Mother Goose


While the weather has been cold and today very foggy, I have been making some baby blankets for my driving instructor. She gave me some scrap and I added some scraps and pretty soon I had two crib blankets ready for new born twins- a boy and a girl. I brought nothing for theses blankets and used what I had. For the batting in the quilt I used a thrift store stripy flannel blanket (the stripes can be seen through some of the fabric but I didn't mind). They are very simple to make and I hope to give instructions for one soon.


I used a simple four patch and one patch for the 'Cow jumped over the moon'.


The cow uses some of the fabrics already in the quilt. Do you spy that piece of white fabric with red roses, yes, it's the same one I used for my bonnet gals tea towels! I still have fabric left over. I also added some applique stars around the cow quilt.


For Mother Goose, I used old pillow cases and some of the scraps used in the cow for Mother's dress, hat, and shoe. I used pale pillow cases to make a softer pastel quilt and simply used a one patch. I appliqued some hearts around too.
I added a tag for washing instructions and I can give my driving instructor the quilts today ( these are a gift and I don't charge a price) when I have my driving lesson. I still need some more lessons for my driving but I'm getting to a level where I am now comfortable with driving, it's still scary but I can do it. If I can learn to drive at 45 you can make this quilt too when I post up the instructions to do you'll find it's as easy as driving.


I hope every one is having a good day or evening where ever you are.

Monday 20 July 2015

Winter yellow's


Winter finally arrived, cold and frosty. My kind of weather. I love Autumn and Winter.
I've been kept busy and pottering around at home as always. A stomach virus hit home and everyone was layed low for a while with that but now things are improving and hopefully I can start blogging again.


 The rose is from dad's roses, the last before he pruned them. This one opened up by the kitchen window and gives a wonderful scent. It now is drying in pot potpourri.


I've also been painting. Just a few small ideas here and there. 


A little bit of stitching has been happening on various projects.


Chicken soup for happiness and health of course.


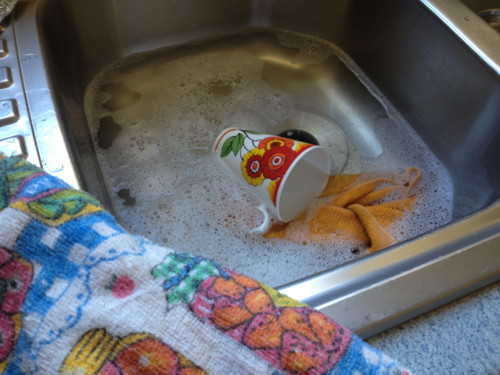
Washing up. As usual.


Ideas for my paintings. 


I hope everyone is having a good day or evening where ever you are.