Friday 31 May 2013

Winter Sun

 
When the days are chilly, sitting in the sun is the place to be. Especially if it is away from the whistling winds of winter.

 There is no better place to wait then in an attractive garden with a suitable bench for sitting and admiring the lovely flowers. 


And there is no better place to meet and greet family who come to visit, then out doors in the warmth of the sun. When it gets too cold that is the time to return indoors...

 
...Curl up with a warming cup of tea and enjoy some reading for future projects. This is the beginning of winter and the end of autumn.

Wednesday 29 May 2013

Journal days

 
The winter weather has set in and there's rainy days with some colder weather. This is the perfect time to go through my paper stash and make junk journals/smash books or whatever you like to call them. This one is a new one in progress.

 
I've also used up some etsy buys making this journal. Now all that needs to be done is to make a back and front cover. When it is finished it will be a good journal to use for the new month coming up.

decorative stitches

 Crazy Quilting looks a complicated craft to do. Like all crafts it just takes a little practice and time. Once you understand the basics there's nothing that is difficult.

 
A handful of simple stitches can go a log way to making motifs for seams.

 
These roses are no more difficult to do than the simple seam stitching. And Crazy Quilting is a very much make do. You can use the smallest pieces of worn out fabric or scrap in your basket and before you know it, you have made something pretty.

Monday 27 May 2013

Take Pleasure

 
"Once upon a time we all walked on the golden road... we heard the song of morning stars; we drank frangrances aerial and sweet as a May mist; we were rich in gossamer fancies and iris hopes. The years waited beyond and they were very fair..."
 
- Lucy Maud Montgomery, The Golden Road.

Sunday 26 May 2013

Simple living - Sourdough Starter

 Simple living classes we learnt a couple of skills for homemade dairy products and useful bread skills with simple yeast.

 
We were given a recipe to make our own cottage cheese. And then we were given a demonstration on how to make 30 minute Mozzarella Cheese. Each demonstration was very interesting and it was great to be shown how easy a skill like this is to do on your own.


We were also shown some Sourdough starters. The easiest was the Sourdough starter with yeast:
Sourdough Starter – With yeast.
 
Begin with 25 g of fresh yeast or 1 tbsp of dried yeast. Mix in  200ml of tepid and put in 500 g white bread flour. Combine the yeast water into a large bowl. Make sure the bowl is deep as the mixture will bubble and rise quite a bit.
 
Then slowly add another 400ml of tepid water. Then combine to make a thick smooth batter. Cover the bowl with a clean tea towel. This mixture should be kept at a cool room temperature out of direct sunlight for around 3-5 days. The mixture is ready when it begins to froth and has a pleasant sour smell.
 
I had a very good time learning and look foward to using these recipes and skills in my own home cooked items.


Thursday 23 May 2013

Sweet roses

 
On youtube I found a channel - work4ever123, showing how to make rolled roses with a glue gun. I spent the some time using the tutorial to make a batch of my own roses. Some roses were more successful than others, the glue was not very forgiving.  I thought though I could hide the terrible ones by adding glitter to them. So none will be wasted. The burlap roses were something a little different!


Once I master the glue gun these will be very pretty to add to scrapbooking items. (Look at that mess).

 
Eventually with some other kinds of fabric, I mastered the glue gun and the finished item looked very pretty and less messy. Of course you could dispense with the glue and sew them instead.

 
For now it is always nice to have a touch of roses on cards while the real ones fade during winter. The rolled roses also can use up lengths of fabric scraps you have so there’s a good reason to give these ones a try!


And I made a card with some of the finished rolled roses. The paper is from Grace Taylor from the stack called : Millie’s garden. The ink I used was Stazon ink in black and the stamp is from FLONZ, who you can find on ebay. I used the last of my stick pins from the NZ scrappers group swap (now on facebook) and an assortment of other items I had in my stash.

Wednesday 22 May 2013

Winter warmth

 
I am doing some more crochet, this time dishcloths. The pattern I am using is from Miss Abigails Hope Chest . The pattern for the dishcloth is Granny square dishcloth and is very easy to follow.


The last couple of days the weather has been turning more and more towards winter. Autumn is ending and there is a call for food like warming, hearty stews, for suppertime.

 
The stew is very simple Irish stew type version. Brown your meat first in a pan, then add to pot of water (stock), carrots, potatoes. Bring to boil. When potatoes and carrots are soft add in peas, beans, celery and onion. Mix up plain flour into a paste and add to pot. Stir to thicken. You can add dumplings on top if you like. This stew is always best the next day as the flavours settle through and taste much better.

Tuesday 21 May 2013

Your own cross-stitch designs


How to design your own cross-stitch patterns with simple pen and paper:

You will need graph paper. Black Pen. Pencil. Coloured Pencils. Sharpener. A photo you would like to stitch (A simple flower image is nice to begin with).


Your graph paper should have 2mm squares to be suitable.
 
To begin. Find a simple photograph or image of your choice. Using tracing paper or free hand your image to paper. Play around with the design arrangement to find something you like.


Once you have an arrangement you like, trace it onto graph paper or freehand draw it as I have done.


Now, take time to square off the drawing using the graph squares as a guide. Try to keep to the photograph as realistically as possible if you want a natural look to your finished stitched item.


Using coloured pencils, match the colours of your photo and begin to shade in the graph image. Square off as you colour in the outline. Keep in mind one square equals one cross stitch.


When you finish shading in your graph image, use a pencil to rule in the graph lines if your graph paper has very faint lines. This will help stand out your graph better. You can also use a pen to highlight the shaded areas a bit more to define where your stitches are. Finally find the centre of your chart by counting down, divide the number of squares you have counted by half, this is your centre for one side. Do the same for across the chart. Connect the two arrows and this is the centre of your chart. The centre of the chart is where you begin cross stitching. The centre matches the centre of your fabric (which you fold in half and half again, the crease is the centre).
 
Now you can go to your threads and pick out colours to match your chart. (White thread is gray shading on this chart. Of course you can leave the area blank too). The pen outline on the chart can also be used to determine where to place your backstitch if you feel the finished stitched item would need it.
 
 
Happy Stitching!


Monday 20 May 2013

Herbal - Rosemary


Rosemary is a versatile herb. It is especially good with lamb and mutton. Use it with vegetables, in pea, spinach and minestrone soups. Use it boiled with potatoes. The leaves can be used to make tea. The flowers can be candied.
 
The common rosemary, Rosmarinus Officinalis, is an ever-green shrub which will grow as high as seven feet despite the legend that the plant never grows taller than Jesus Christ was when on earth. It is said also that when a plant reaches his earthly age, thirty years, it will grow no taller, only wider.
 
The flowers are a lovely blue and smother the stems in late spring. The more you cut rosemary the better but this means taking only sprigs. If you cut it back hard into the old wood it is likely to die.
 
Rosemary thrives best in a light, dry soil, in a sunny position. Do not plant it in wet or heavy soils. It can be raised from seed sown in spring in open soil. But the best means is from propagation of six inch long cuttings taken in summer.  

Sunday 19 May 2013

Warming Joy

 
At the Simple Living classes this weekend, I enjoyed learning how to make some hearty supper dinners for the family. Our teacher was very kind and helpful in showing us how to make her dinners. By the end of the lesson I was confident with taking home some knowledge about both meals and know I can do them comfortably myself at home.
 
 
Potato Bake:
 
Potato peeled. Onion. Ham or Bacon. Thickened cream. Grated cheese.

Thinly slice potatoes, onions and set aside. Dice ham and set aside.

Assemble into small casserole dish and place layers of potatoes on bottom of dish. Then sprinkle onion, ham and repat layering. Pour over thickened cream and sprinkle cheese on top. Bake in oven at 200 degrees for about 35 mins or when potatoes are tender.


Curry Base:

Oil. Onion, carrot, potato. Frozen peas. Stock. Creamy evaporated milk. Cornflour. Sausages (or whatever you like).  

Peel carrot and cut thinly. Dice onion and potato. Heat pan and add oil in pan. Cook sausages. Remove from heat and set aside. Add oil and heat then add onions, carrots, and potatoes until vegetables are tender. Stir in curry power, add combined water and stock, add peas, and bring to boil. Return meat to pan, add combine evaporated milk and cornflour. Bring to boil and stir until thickened.


There’s nothing more enjoyable than learning about simple home cooked, comforting warm meals on a windy cold day.  And then taking both meals home for supper to enjoy, one for the day and one saved for the next day. Lovely.


Friday 17 May 2013

Very Victorian

 
A box of  now sorted through things yielded some old treasures. A collection of crazy quilt hearts I stitched but never finished. Now I am thinking of what to make these hearts into.

 
Each heart has it own unique style. You never know what you might find...a lady out walking her dog, perhaps.


There were also other treasures. A soap box filled with interesting buttons. Plastic, but still interesting; those buttons will find their way onto a future project. The two scarves are real treasures, too pretty to cut up for crazy quilting, they will be for me. And there's an embroidered tapestry picture, started by someone else. That's alright at 20 cents how could I leave it behind?

 
And then, it was time for a cup of tea and thinking of new projects!

Thursday 16 May 2013

Homely Comforts

 
The shawl I was working on is finally finished. I used a bag of wool from the thrift store so the shawl is a make do and use what you have project. It was a good beginner project to learn crochet and I am looking forward to working on some more crochet projects.

 
I sorted through my craft books and set some aside for future reading and project ideas.

 
 Some times it is nice just to stay home and make do with what you have. 
 
While browsing through the Internet Archive home link I came across links to a set of DVD's all about homely comforts from the West Ladies. Here is the link to those videos if you are interested: Homestead Blessings.
 
The Internet Archive is a wonderous place to look for other source material that is free. There is a treasure trove of vintage sewing, embroidery, and homemaking books available. Grab yourself a cuppa and settle for a good read.

Wednesday 15 May 2013

Today's card

 
After spending time sorting through all my crafting stash, cleaning, discarding and organizing those loose bits you eventually gather, I sat down and made a simple card.

 
I used a gatefold style card and arranged the items I wanted to use around the fold of the card.
 
 
This cheerful topper was one of the very first sticker sets I brought from ebay when I found out I wanted to paper craft. Back then, I had one black ink, two stamps, some paper and these stickers. Luckly I also had many bits of lace and things from my sewing I could add. It just goes to show you really don't need much to start any craft. Just start.

Monday 13 May 2013

Patchwork days


“How much piecin' a quilt  is like living a life...The Lord sends us the pieces, but we can cut 'em out and put 'em together pretty much to suit ourselves.” - Unknown.

Sunday 12 May 2013

Home grown. Home made.

 
On Saturday I attended a demonstration for Basil Pesto. The co-ordinator of the group: Simple Living, Margy, is organizing some very lovely learning skills on simple living and each workshop and demonstration is to learn a skill for those who are looking to live a simple way.

The group and more about their workshops can be found here: Simple Living Toowoomba.
 
 
The demonstration for Saturday was to show how easy it is to make Basil Pesto. Fresh organic basil was brought in and the aroma was beautiful.
 

We were then given a recipe for the Basil Pesto as we watched Margy and David show us make the Pesto. They used both a small food processor and a bullet blender. Each processor gave a very distinctive finish to the Basil Pesto. The food processor gave a grainy finish, while the bullet blender gave a very paste like appearance.
To make you will need ¼ cup of pine nuts. 11/2 cups of fresh basil leaves. 2 small garlic cloves halved. ½ cup shredded parmesan and about 7 tbs of olive oil.
Toast your pine nuts until lightly golden. Combine nuts, basil, garlic, oil and parmesan in the bowl of a food processor and finely chop. Serve into a small bowl.

 
After the recipe was made we dined on the finish product with crackers and cheese.
 

When the demonstration was over we all had a cuppa and then we had a look at was was available on the take home trade table. If you brought in five items you could trade for five items. I brought in five items and went home with a generous handful.


My trade, the rosemary and parsley and my take home trade. The popcorn was delicious.


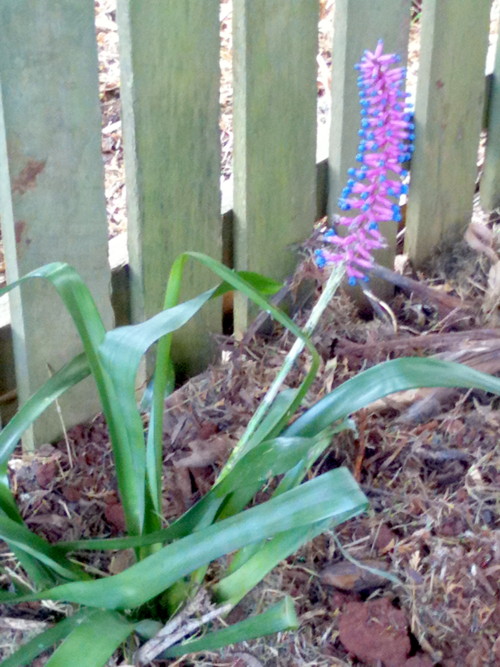
One of the flowers I brought home and planted with dad’s help. He knows about these types of plants. They don’t like full garden soil, they like mulchy soil and dappled shade. This Bromeliad is planted with some others from the same family.
 
It was a very nice time to be had for the day and I look forward to learning all I can from the group and their generosity.

Tuesday 7 May 2013

Laugh and flowers

 
I made a paperbag card today inspired by the paperbag card tutorial at Chan4crafts youtube link.  I did it a little different. I had a different size paperbag (mine was 10cm square).

 
I also didn't use seam binding for the join in the card, I used paper instead. And I used different matching papers for front and back as well as in the middle of the card, to use up some scrap papers I had leftover. The paper I used was Grace Taylor brand.

 
The stickers, bling, butterflies were brought from our local Sam's World and Crazy Clarks stores. The flowers I brought on ebay. Everything was all in my stash for a while and I had fun using what I have. I think these types of cards will be very good for placing small items in like photos or those store gift cards that have credit. It would be easy enough to adapt this to a mini album book as well.