Monday, 30 March 2015

Crayon Tinted Embroidery: Introduction

Tinted linens & Quilts.


Tinted embroidery is as simple as colouring in pages of a colouring in book. Over time tinted textiles have held a special place in popular embroidery. Items from toys, needle cases, quilts, laundry bags, pillow slips, tea towels and other humble linens used for the home once featured tinted colour and or combined with embroidery stitches. A touch of tinted colour often transformed simple, popular motifs into artful timeless treasures. Hand tinted novelties from the 1920’s, 1930’s and 1940’s were at the peak of popularity.  The charm of tinted works of these eras were so popular it is hard to image the era’s without them. Today tinted embroidery is rarely heard of and many collectors appreciate the vintage charm older pieces have.


To make:
STEP 1: Position material over a pattern, secure corners with masking tape. Trace pattern outline directly onto material with a blue line fade away pen or pencil if you prefer.
Click on to enlarge image, right click save. Then print.
Step 2: Place material on a padded surface like a stack of printing paper to work on. And begin to colour areas with regular children’s Crayola crayons.  Colour the pattern well with the crayon colour to make sure no fabric is showing through. White, cream, and very pale coloured fabric is best for any tinted embroidery.
Step 3: Sandwich the material between two sheets of plain paper. Iron on ‘cotton’ setting to ‘set’ the crayon colours.


Step 4:  If desired the design can now be embroidered using 3-ply embroidery thread (floss) to outline the design in simple stem stitch (outline stitch). Plain black embroidery thread looks effective but you can also use embroidery thread to match the colour of the tinting. Use a darker shade (colour) of thread to go with the tint.

Washing care:
Once set, linens can be machined washed in cold water. If you have a potholder I prefer to wash mine by hand. I swish it around in mild detergent and roll it up in a towel to squeeze out excess water then hang up to dry. 

...And then he ate some radishes

.
I hope everyone is having a good day or evening where ever you are.


Strangers and Pilgrims on Earth

Sunday, 29 March 2015

A snippet of this and that


The weekend was nice and fine, on Saturday I attended the Simple Living workshop on how to make home made beauty products. It was a really interesting lesson on how cheaply it is to make your own products and how healthy they are when you are just adding a few natural ingredients. Nanna Chel of Going Grey and Slightly Green gives a good run down of what happened at the workshop.  There was also a swap table and I came home with some pumpkin, beans, rocket, and we were given some home made beauty products to take home after I swapped my Pot holder ladies which seemed to be approved of as I didn't bring any home. I did seven and have two left for presents at a later date. A very good day I think.

Mum preparing dinner

Sunday came around. Palm Sunday for religious folk and Sunday dinner for us. Mum prepared the meal and Dad set up the BBQ that's just been sitting for ages not being used to be finally be put in use.


The meal turned out very nice. All the family who came over seemed to enjoy it too.


I hope everyone is having a good day or evening wherever you are.

Friday, 27 March 2015

A quiet life


"Make it your ambition to lead a quiet life...


 to mind your own business...


 and to work with your hands...


...just as we told you." 
1 Thessalonians 4:11


I hope everyone is having a good day or evening where ever you are.


Wednesday, 25 March 2015

Card for today


Another hot day and a late storm. While it was raining I made up a quick card. The background paper, the above image, I found on pinterest and printed it out to cover my card with. To alter the background paper I used a resist technique. First up I used KaiserCraft music stamp and inked up in Versamark. I stamp over the entire background. I then used a Embossing powder from Celebrations of Australia: Hologram. I brought this ages ago so not sure if it's still about. When embossed it's comes up glittery. I used TSUKINEKO Dew drop Memento ink in Grape Jelly and inked over the embossing. It's best to start off light and build up the dark ink to let the embossing show through. I added a 'For You' stamp, using Stazon ink in black. The stamp is from the cheap stores, Wayne's world. I added the stamped 'for you' on stiff card, popped it up with some foam squares. Then I added a ribbon which is grape color. The ribbon came from some towels mum brought at Aldi. I then added a few gem stones, they came from the cheap stores too. Inside the card I simply inked up the edges of the card in the same Grape Jelly used through out the front of the card.

Materials used: 
Image above
TUSKINEKO dew drop Memento ink: Grape Jelly
Versamark Ink
Stazon Ink in black
Card stock for the card
Ribbon
Stick on gems

I hope everyone is having a good day or evening where ever you are.

Applique 101

HOW TO APPLIQUE


Appliqué technique has a few different methods that can be used. There is the traditional to the super quick method.

TRADITIONAL APPLIQUE:
To begin lightly trace appliqué design onto background fabric with a pencil. Trace each appliqué piece onto paper and cut out. Pin each paper shape, face down onto the wrong side of the appropriate fabric, then cut shapes from fabric, adding 7mm seam allowance. Clip curves and V’s.
Turn seam allowance over the edge of the paper and tack in place through both layers. Pin or tack shapes in place on background fabric and stitch in place with small hemming Stitches in matching thread, catching only the folded edge of the shape. Stitch within 2cm of starting point, remove paper with tweezers and finish stitching.

TRADITIONAL APPLIQUE TWO:
Trace appliqué design onto background fabric with a pencil.
Trace each appliqué piece onto firm paper and cut out. Draw around each shape on the right side of the fabric and remove pattern piece. Cut out shapes from fabric, adding 7mm seam allowance. With fingers, turn under seam allowance, following pencil line and tack in place as you go. Pin tacked shapes to background and stitch in place around edges with small hemming stitches, catching only the folded edge of the shape.

NO TURN APPLIQUE:
Cut all appliqué shapes, with a 7mm seam allowance, from both coloured fabric and backing fabric, such as lawn or calico, taking care to cut mirror pairs.
With right sides together, stitch shapes together around edges, leaving a small opening for turning. Clip curves, turn right side out, slip-stitch opening closed, and press. Stitch these shapes to background, using small hemming stitches.

SUPER QUICK APPLIQUE:
Trace appliqué outlines onto double-sided iron on webbing. Cut out roughly and fuse each shape to wrong side of appliqué fabric (This will result in reversed image. If you want image to be the right way round, flip outline before tracing.) Cut out accurately along traced lines.

Remove backing paper and press shapes onto backing fabric. Edges can be left unstitched, but to make them more durable, they should be finished with machine appliqué (a close, narrow zigzag), or with blanket stitch by hand.


Useful links: 


I hope everyone is having a good day or evening where ever you are.


Tuesday, 24 March 2015

Rose delights


MAKING ROSE WATER
To prepare rose water, first gather fresh rose blossoms; this should be done in the morning when all dew has gone. Next place petals in a glass, stainless steel or enamel saucepan and cover the petals with distilled water. Weigh the floating petals down with a heat-resistant glass dish.
Place pan over low heat and allow the steam to release for at least an hour. After an hour drops of rose oil floating to the surface of the water should be seen. Do not allow the water to boil.
When the water has taken on a rosy hue, feels thick and soft, and rose oil can be seen on the surfaces train and press all the liquid from the petals. Store in refrigerator.

(NOTE: Don't use roses sprayed with chemicals)

USES
Use as a light fragrance. It doesn't last long but is nice for it’s brief uplifting scent of fresh rose petals.
Rose water may be used as a skin toner by applying to the face with a cotton ball.
Hair Rinse. Use after shampooing and conditioning hair. Thoroughly rise and follow up with rose water. It leaves a delicate scent in hair.
Scented bed sheets. Place in a spray bottle and lightly mist sheets.
Use in Turkish Delights.
Use in rose jams.


HAND-MILLED ROSE SOAP WITH ROSE WATER:
Melt basic soap and rose water in a saucepan, no water is required. Add  about 2 tablespoons of glycerin stir well and add a fragrance if desired. You can also had a soap dye at this stage if you like. The rose water made from red roses will do a good job of coloring soap so no dye is really necessary. Pour soap into molds. Chill for 15 mins in freezer then take out of molds. Cure for two weeks if using brought grated shop soap, if using home made  grated lye soap cure for over six weeks.

More about hand-milled soap: Hand milled soap


I hope everyone is having a good day or evening where ever you are.

Sunday, 22 March 2015

A touch of gold


We has some storms past through over the weekend. In our neck of the woods the storm knocked out the power during the night. Most folks would just go to bed, like you would. But we generally stay up and it's usually not long before the power comes back on. During times of black out we use solar battery lights that work a treat and a little more safer than candles and lanterns. Not as romantic though. If you are looking for an alternative light source during blackouts consider the solar lights. I don't think you'd go wrong.


The storms announced it was the change of the season and brought in Autumn. It's a little cooler today and feels a bit like Autumn should. I brought this wood chopper bloke from the thrift store for not much, when you turn him over you can see the axe head. He's missing a 'pearl' off his belt which is okay by me. He's a brooch (pin) and is very suited to Autumn don't you think?


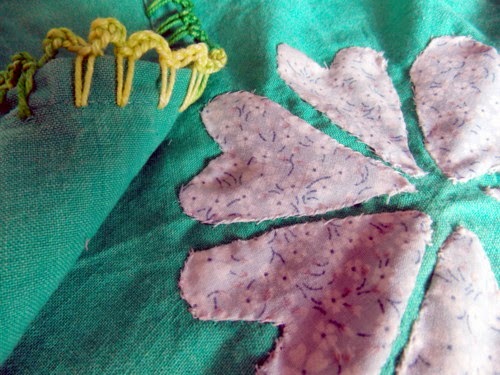
I've been working on some new 'lessons' too. I enjoy applique and use a variety of techniques to produce it, so felt it time to show the simple ways to applique My sunbonnet gal tea towels are applique and embroidery, but they don't use the paper piecing like above. More on that soon.


I also brought some more flowers. This time potted ones and not seeds but they were just as cheap as a packet of seeds which is why they came home with me. These are old fashioned Pinks or Dianthus they usually are part of the many flowers found in cottage gardens and have a lovely heady clove-like scent which will be useful for potpourri.


I've also been embroidering a set of napkins for another 'how to' which will come soon. The napkins go with how to recycle something you'd usually toss out. Y'all know how I like to recycle rubbish and get a kick out of other peoples junk from the thrift store. These napkins were from the thrift store napkin bin and you do have to scrounge around in the bin to find something or the complete set, for nothing over 20 cents I'll scrounge.
Well, that's my weekend. A quiet one only interrupted by noisy Mother Nature but it is the only interruption to quiet I like.


I hope everyone is having a good day or evening where ever you are.

Friday, 20 March 2015

Thursday, 19 March 2015

Parsley


 PARSLEY

Parsley, Curled (Petroselinum crispum) Umbelliferae. Biennial.
Parsley, Italian; (P.crispum neapolitanum) Umbelliferae. Biennial.
Progation; seeds. Spring (again in Autum in temperate climates).
Position: sunny.
Soil: average, well drained.
Height: curled parsley, 25 cm (10 inches) Italian parsley, 45 cm (11/2 feet).
Parts used: leaves, root (sometimes).

Curled Parsley
DESCRIPTION
Curled parsley, as the name suggests, has tightly curled leaves of bright green. Some kinds may be more crinkled and tightly curled than others, such as tripled-curled and moss-curled varieties. P.crispum is the variety of curled parsley that people usually refer to as parsley, and is the most widely used.

Italian parsley, which is not so familiar, has leaves which are not curled, but are deeply cut and serrated like the tops of celery or lovage, the flavour being regarded by many as stronger than curled parsley. However, curled parsley is preferred for garnishing because of its more decorative leaves. Another lessen known variety is called Hamburg parsley which has a long white root like a parsnip and is mainly grown for these roots which can be used cooked as a vegetable.

HISTORY AND MYTHOLOGY
It is widely believed that parsley originated in Sardinia, although an early writer says that parsley has such a curious history no one can truly tell what native country it is from. Probably the plant has been altered over time by cultivation to have lost its original source. It occurs in mythology and believed to have sprung from the blood of a Greek hero, Archemorous, the forerunner of death. Grecian gardens were often bordered with parsley.

CULTIVATION
To propagate parsley, so seed in spring and also in autumn in temperate climates in finely dug soil, in drills 30 cm (12 inches) apart, where the plants are to grow, thinning out later to approximately 8 cm (3 inches) between plants. Curled parsley is the most difficult tpe to grow, the seeds sometimes taking two weeks to germinate, during which time the bed must never be allowed to dry out or the seeds will cease germinating. If this has occurred, further watering is of no use, the seeds must be resown and more care taken. Italian parsley is much easier to grow. Three to four days after sowing the seeds will usually germinate, provided that they are very lightly covered with soil to not more than 6 mm (1/4 inch) in depth and kept moist. As parsley is a biennial to keep it from going to seed during the first year, cut the long flower stalks as they appear. However, the second year’s growth is never as good. Sow seed each year to ensure strong healthy plants.
Italian Parsley

HARVESTING AND PROCESSING
Parsley can be cut for drying at any time. It will keep its green colour and flavour if dried quickly in a warm oven preheated to 120 degrees C (250 F). After turning the oven off, spread out the parsley heads, which have been snipped from the stalks, on a large try or baking dish, and leave in the oven for fifteen minutes, turning several times until crisp-dry. Store them in airtight containers away from the light. For freezing, chop fresh leaves finely, mix with a little water and put them into ice cube trays in the freezer. Sprays of fresh parsley may be wrapped in foil and frozen. Parsley butter freezes well too.


CULINARY
Parsley’s tat is usually described as fresh and crisp and sometimes a little earthy. It  is also unassertive which makes it complimentary to other herbs in mixtures. It is often used as one of the four herbs in “fine herbs’ blend, the other herbs being chervil, chives and tarragon. A spray of parsley, bay leave and each of thyme, marjoram, are the herbs which make up a bouquet garni. Parsley leaves whether freshly chopped or dried go into sauces, omelettes, scrambled eggs, mashed potatoes, mornay’s, salads, soups, pasta dishes and vegetable dishes and with poultry and fish.  Fresh curly parsley are used for garnishing and when crisp fried make a delicious accompaniment for fish. Nourishing parsley jelly is made from fresh leaves. Parsley tea is made from fresh or dried leaves.

MEDICINAL
All parts of the plant, roots, stems, leaves, and seeds, are useful and beneficial. The roots were once boiled and eaten as a vegetable, particularly the large Hamburg variety. The stalks of Italian parsley have been blanched and eaten like celery. The foliage of all variety is rich in iron and vitamins. Parsley tea made form leaves or root assists kidneys, digestion and circulation.

COSMETIC
Parsley has been included in rubbing lotions for the scalp and hair before shampooing and to make dark hair shiny. Parsley is also used in herbal lotions for closing large pores and as a freshener for the skin and to reduce puffiness around the eyes.

COMPANION PLANTING
Parsley is helpful to roses in the garden, a low border of curly parsley plants being attractive and beneficial at the same time. Parsley also aids tomatoes. Honey bees are attracted to parsley when it is in bloom.


ITALIAN HERB MIX

1 part dried oregano
1 part dried thyme
1 part dried parsley
1/3 part salt

Mix together and put into a shaker container, label and date.


Oregano one of the dried herbs uses in the Italian herb mix with Parsley


I hope everyone is having a good day or evening where ever you are.

Wednesday, 18 March 2015

Festive Biscotti

1 egg
1 egg yolk
2/3 cup caster sugar
Ginger slices
Glazed Cherry slices
Walnuts chopped pieces
1 1/3 cups plain flour
½ teaspoon baking power

METHOD

Preheat oven to 180C/160C fan forced. Line 2 large baking trays with baking paper. Beat egg, egg yolk, sugar and ginger, glazed cherries, and walnuts in large bowl until pale and thick. Sift over flour and baking powder. Stir to combine. Turn out onto a lightly floured surface. Knead lightly until smooth. Divide dough in half. Shape halves into 20 cm long longs. Place on prepared trays. Flatten slightly.

Bake for 30 minutes or until golden. Cool on trays for 15 minutes. Reduce oven to 140C/120C fan-forced. Using a serrated knife, slice logs diagonally into 5mm thick slices.
Place slices, in a single layer, on baking trays. Bake for 20 to 25 minutes, turning halfway through cooking, or until dry and crisp. Stand on trays for 5 minutes. Transfer to a wire rack to cool. Serve.


I hope everyone is having a good day or evening where ever you are.

Tuesday, 17 March 2015

Washing Day

Pear blossom by Curzona Frances Allport (1860-1949)

In many early artistic works in Australia the simple domestic life of women settlers featured as a subject. In some paintings the humble days of washing is just visible in the backdrop of the Australian landscape. In other domestic paintings the domesticity of wash day intrudes into the landscape. The wash day by these artist was not seen as unromantic like the Hills hoist clothes line found today in numerous back yards. Yet even the Hills hoist has its benefits, no line falling to the ground in the mud, for example.

A woman of the house hangs out her laundry in a full laundry apron, while smoke comes from a fire for the copper boiling in the laundry room.

Washday, usually Monday, was part of everyday chore of house keeping. Some home keepers managed to brighten the existence and rise above it by using whimsical and charming pieces of craft work, such as the simple  peg bag. Washday, was and still is a large part of domestic housekeeping and even today novel homemade pieces explore the theme of washing the family clothes.


WASH DAY SENSE
-Wait until you have a full load before running your machine. If you have a smaller wash, remember to rest the water level. 
-Stick to a short cycle, which is usually sufficient for all but heavily soiled items.
-Don’t use any more detergent than you need. It won’t make the clothes any cleaner.
-Use eco-friendly detergents that are petro-chemical and phosphate free or low in phosphate.
-Clean the washing machine filter regularly to keep your machine working efficiently.

DRY WISELY
-Whenever the weather permits hang your washing outside to dry. Ultraviolet light from the sun will eliminate bacteria and dust mites.
-Shake and smooth out clothes prior to hanging them, to reduce need for ironing.


ALL PURPOSE LAUNDRY “POWDER”
½ cup washing soda
1 cup finely grated pure soap
½ cup salt
½ cup borax
½ cup bicarbonate of soda

Put the washing soda crystals in a clean plastic bag and crush them fine with a rolling pin. Mix the crushed washing soda with the rest of the ingredients and store in an airtight box or jar.
Use 1 tbsp for a small load. 1 ½ for a medium load and 2 for a large load. Dissolve in jug of hot water before adding to a top- loader. If using for hand washing be sure to use rubber gloves.

FABRIC SOFENERS
-Add 1 cup white vinegar to your washing machine during rise cycle. If your washing machine is a front loader, add 2 tbsp of white vinegar to the fabric conditioner dispenser.
-For a fresh fragrance add a few drops of lavender, lemon, rose or eucalyptus essential oil to the vinegar.
-Bicarbonate of soda is also and excellent fabric softener. Add ¼ cup to the wash with a few drops of essential oil.

PRE WASH STAIN REMOVAL
-1/4 cup borax to 500 ml water. Pour mixture into spray bottle. Use it on stains before washing but shake the spray bottle first.
For stubborn stains:
-3 tablespoons mild, colour-free dishwashing liquid, 3 tablespoons vegetable glycerine and 375 ml water in a spray bottle. Spray. Leave for 15-30 minutes before washing.
-Soak nappies overnight in a bucket of hot water with ½ -1 cup borax. Wash as usual, adding 1 cup vinegar to the rise.

BRIGHTER WHITES
Instead of using products with chlorine bleaches some of these tips will brighten up your whites
-          Add 1 cup each methylated spirits and cloudy ammonia to help dissolve and lift off settled dirt
-          Add ½ cup borax in hot water
-          Use old fashioned washing blue
-          Washing white bed linen with blue towels has a similar bluing effect

EUCALYPTUS WOOL MIX
This recipe is ideal for blankets, quilts, and pillows. The Eucalyptus oil helps to keep the wool soft and also repels moths.

2 cups soap flakes
½ cup methylated spirits
25 ml eucalyptus oil

Add all the ingredients together in a wide mouth jar. Cover with lid. And shake until combined.
Use 2 tbsp wool wash per liter of warm water, then rise.


I hope every one is having a good day or evening where ever you are.


Monday, 16 March 2015

Victorian Greetings

PRESSED ROSE GREETINGS CARD


MATERIALS
Card Stock 6 in x 12 in
Pressed rose with leaves
Wet craft glue for plant material 
Tsukineko Memento ink: Lady Bug
Paper doily
Glue stick
Scissors
20 in of red ribbon about 1/2 in wide


1 Fold the card stock neatly in half length ways to make a stand-up card.

2 Carefully place the pressed rose in position on the front of the card, 
then remove and place wet wood glue on the flower. 
Press the flower in place and allow the glue to dry.

3 Cut the paper doily to trim the outside edges of the card. 
Ink the paper doily cuts out all over in TSUKINEKO Memento ink in Lady Bug 
Glue in place around the edges of the card with a glue stick.

4 Finally make two slits along the fold of the card, thread the stain ribbon through 
and tie into a pretty bow. 
You may also like to write the botanical name beneath the pressed flower.

For pressing flowers: Introduction to pressed flowers.


I hope every one is having a good day or evening where ever you are.

Friday, 13 March 2015

Granny Mac’s Fruit Cake

a smaller cake from a larger batch added to a lined tin

Granny Mac and my mum are old timey cooks, they don’t use measuring cups and measuring spoons. Everything is a handful of this and a pinch of that. Granny Mac was the same and she showed mum how to bake this cake by demonstration.  I learnt this cake by videoing mum one day while she made it and I wrote down the recipe. Keep in mind this is a rough measurement.

Granny Mac was mum’s mother-in-law. She passed away a few years ago.

To Make:

Line a tin with baking paper.

- Self raising flour (roughly) 2 1/2 cups
- Sugar. ½ cups
- Fruit: Sultanas. Mix Peel. Glazed Cherries. ½ packet each of Sultanas. Mix Peel. And only a handful of Glazed cherries. Don’t over do the glazed cherries unless you want a Christmas cake.
- Couple of big spoons of melted butter.
- Heap teaspoon of Bi-Carb soda.
- Eggs. 3 eggs if you are making a small fruit cake. Mix eggs into mixture fast so they don’t cook in the hot melted butter.

Bake at 170 degrees for a fan forced oven. Put a knife in the cake if the knife comes out clean the cake is done.


I hope everyone is having a good day or evening where ever you are.

Wednesday, 11 March 2015

Candlewicking Embroidery

INTRODUCTION TO CANDLEWICKING


Candlewick Embroidery 
It is said Candlewicking embroidery came from the story of American pioneer women, while sitting around their fires at night, started embroidering pieces of heavy calico used to cover their wagons with the cotton wicking used in making candles. Both materials happen to be cream and, in order for the embroidery to be felt and seen, they stitched with French or Colonial knots as these stitches stood above the fabric.

Today Candlewicking has been refined, but it has retained its homespun charm and character. Simple stitches are used – satin and stem stitches with knots as the main stitch. When stitching you should use an embroidery hoop.

Material to use:
Calico (Muslin) 
Thread to use:
You will need to use a thicker thread. Pearl cotton from DMC is suitable.


Transferring a design:
On a piece of muslin (calico) trace off the preferred design leaving sufficient space between them for using your hoop. To trace, place the design under the fabric and draw the pattern using a soft sharp lead pencil or a blue fade away/wash away pen.

Right click to save design to try your own Candlewicking project. Note: The straight lines in the center of the flower is straight stitch
Colonial Knot Stitch:
Start off by bringing your needle through from the bottom of the fabric. So that you are starting your stitch with your thread on top of your work. Take the thread in your left hand between thumb and pointer finger. Push the thread over to the right, insert the needle underneath the thread. With your left hand bring your thread over the top of the needle.


You then have a little knot which you can slide down the needle and put the tip of the needle in where you came up from, give a little tug to tighten the knot and push the needle down from where the thread came up.


I hope everyone is having a good day or evening where ever you are.