Saturday, 12 December 2015

Relaxing scents

Make yourself a merry little Christmas. 24 days of gifts and makes to create a frugal home made Christmas.

DAY THIRTEEN:

Scented Bath Salts.

You will need:

Salt
Epson salts
Baking soda

Essential oils

Food coloring

Attractive glass bottles that keep out moisture

Ribbon and flower trims to match your scents.


Method:

In a large bowl, mix to combine 6 parts salt; 3 parts Epson salts, to soothe tired muscles and reduce inflammation; 1 part baking soda, to soften waters and alleviate skin irritation.

Add a few drops of essential oils ( Be sure to check for an allergic reaction first) and combine.

Add a few drops of food coloring to match the scent you place in your salts, for example, peppermint use green coloring, until you achieve the desired shade. Present the bath salts in a stoppered and labelled container to keep out moisture.  Add a gift of soap and a face washer as desired.


I hope everyone is having a good day or evening where ever you are.

Glittery snowflakes


Make yourself a merry little Christmas. 24 days of gifts and makes to create a frugal home made Christmas.

DAY TWELVE:

Hot glue snowflakes


Snowflakes Ornaments

You will need:
Clear hot glue sticks
Hot glue gun
Baking paper
Surface that can take a bit of heat
String
Wet glue
Glitter


Method:
Draw out a snowflake shape on baking paper. Keep the shape simple and not too large. You can make a large snowflake but you will have to keep thickening it with the hot glue. A smaller shape requires only a few layers of hot glue.

Using your hot glue trace the snowflake shape. Work from the centre out, and then let it cool. Add another layer of hot glue tracing the snowflake shape as before. Keep this method going until you feel the snowflake has enough thickness.

Add a hanging loop at the top using a dollop of hot glue to secure.

Let cool.

Peel off the snowflake from the baking paper. Pull away any unwanted hot glue strings.

Once cool, using your wet glue coat the snowflake, then before the glue dries sprinkle glitter over the entire snowflake. Let dry. Make sure the snowflake is well covered and there is no hot glue showing. Do this front and back. If you don’t want your glitter to flake off you can also brush over a coat of artist acrylic varnish.


I hope everyone is having a good day or evening where ever you are.

Friday, 11 December 2015

Wrapping paper


Make yourself a merry little Christmas. 24 days of gifts and makes to create a frugal home made Christmas.

DAY ELEVEN: 
Wrapping paper uses.


Wrapping paper can be useful in scrapbooking. The paper can be used as a background or elements can be cut from the paper to be used as card toppers or as individual motifs for journalling cards. You can also use the wrapping paper to make your own Christmas tags, recipe cards, or even postcards.

The cards below use a variety of scrap pieces to make up journal cards for December Dailies, Project Life, Planners, Smash books, and any other scrapbooking use. 

When you want to use wrapping paper images, look at the over all design of the paper. Some elements can be cut out singularly other designs can be used as a background. Most times there is a repeat motif like the Santa Claus on the above wrapping paper. These repeat motifs can be fussy cut out and foam dots can be used to layer them. I layered two Santa Claus's, then cut the head out only and layered it again on top of the other two Santa Claus's. I added glitter glue to highlight some of the motifs on the suit.

The presents on the next wrapper I also cut out singularly. I cut out the bows and using foam dots layered them under the original bow to give dimension. I also pulled apart double layered stickers and added those to the presents, as well as real ribbon bows.

When cutting out wrapping paper like this, I always cut out small sections and then glue the paper to thin card. I then cut out the shapes with small, fine sharp scissors. Edges of the cut out can also be inked as well. 

If there is very small motifs on the wrapping paper, like the snowflakes with the Santa Claus, don't waste them. Cut them out too and glue them to paper clips to be used in planners and journals.

This is a nice way to use up all those left over tags, and other Christmas-y bits at the end of Christmas.  


I hope every one is having a good day or evening where ever you are.

Thursday, 10 December 2015

Christmas Bell


Make yourself a merry little Christmas. 24 days of gifts and makes to create a frugal home made Christmas.

DAY TEN: 

Silver Bells.

You will need:

Cardboard, thin but not too thick. String. Glue, (wet glue, not a stick.) Scissors. Kitchen foil.

This is really easy craft and makes use of what you have at home. First cut out a bell shape from your cardboard (recycle cereal packets is fine). Run a bead of glue to follow the ridges of the bell. Along the glue add your string. Let dry.  You can keep your bells plain or add in some lettering, write out the words you would like in glue, then follow the glue line with string. It is fiddly but doable. When everything is dry cover the bell shape with kitchen foil. Gently press around the string to bring out the shape in the foil. To cover the back make another bell the same and glue both together.


You can make these bells as plain or fancy as you like. Larger bells can be used as a bunting around a Christmas table, medium bells can be used on the tree, and even smaller bells can be used as gift tags on presents. 
Fancy bells can also have lace, and paper flowers of choice.


I hope everyone is having a good day or evening where ever you are.

Wednesday, 9 December 2015

Homemade flowers


Make yourself a merry little Christmas. 24 days of gifts and makes to create a frugal home made Christmas.

DAY NINE:

Felt flower hair clips.

You will need felt in assorted flower colors. Plus green felt. Because this is such a small project this can use up all your scrap felt pieces.

You can cut your felt flower shapes out by hand. I used Marianne design Creatables die number: LRO145

I used the largest flower in the set. I cut the first flower just to the center. The next flower I cut 1 petal out of the flower. The third flower I cut 2 petals out of the flower. I then used glue to stick the first and last petal of each flower together. 


 Finally the flowers were stacked inside of each other. Alternate each flower when you glue them together so the petals are not all together. Add a flat back gem or button of your choice. Cut out  leaf shapes from the green felt. Cut two small leaves and glue them together. Then glue them to the back of your flower. Use strong glue to glue the entire finished flower to your clip.


I hope everyone is having a good day or evening where ever you are.

Tuesday, 8 December 2015

Herbal candle


Make yourself a merry little Christmas. 24 days of gifts and makes to create a frugal home made Christmas.

DAY EIGHT:


Herbal candle wreath


This is a simple Herbal wreath made from kitchen garden herbs.

You will need:
Rosemary
Bay
Thyme
Basil
Parsley

Any other herb of choice as long as it is fresh. You could make a flowery one using nasturtiums and calendulas as well.

Garden twine

Dried Orange

Dried Lavender wand (Optional)

A terracotta pot. I gilded mine using gold leaf gilding kit brought from any art section. A candle of choice. Again optional. You will also need a base to set the pot and wreath on.

Make a wreath from Rosemary. Lay the Rosemary against each other and at the bottom of the stem wrap twine tightly to hold the stems. Add the next Rosemary against the last, bring the twine down around the Rosemary loosely and then wrap tight, at the stem, to hold the Rosemary in place. Continue this way until you have a wreath. Tie off the twine tightly. 

Now begin to add the other herbs, gather them up and using the garden twine wrap them around the wreath tightly. Continue as you did the Rosemary wreath, wrap the herb bouquet tightly and then loosely bring the twine down to the next section add a bouquet of herbs, wrap tightly around the stems. Continue this way until you have the entire wreath covered in herbs.

Sit the terracotta pot on a dish, then add the candle. If you don't want to add a candle you can fill the pot up with other useful kitchen cooking items, such as dried herbs or seed packets. If you don't want a real flame candle you can also add one of those solar flickering ones as well.

You can decorate the wreath with dried orange slices, some tinsel, a small lavender wand.

As always be careful when burning candles. Never leave unattended. Never leave around pets or small children. Don't let any greenery near the naked flame. Be safe.


I hope everyone is having a good day or evening where ever you are.


Monday, 7 December 2015

Left over treasures


Make your self a merry little Christmas. 24 days of gifts and makes to create a frugal home made Christmas.

Day Seven:

Sparkling loop earrings


You will need:
Assortment of beads in various shapes and sizes
Wire
Loop earring findings
Earring posts/hooks
Crimping tool
Wire cutters

Method:

The main aim of these earrings is to use up any left over beads and any short left over wire. The wire can be from 3 inches to 5 inches long.

If you prefer you can use loop earring findings. The loop is already made for you.

Earrings using a ready made shop brought loop finding

Thread your beads onto your wire. A clip of some sort will help stop them sliding off and flying off your wire. Leave enough wire to thread one end through the last bead on the wire. Pull the wire up to form a loop. Slide on a crimp bead over both wires and crimp the bead firmly closed. Trim off excess wire. Attach the bead loop to your earring post by gently pulling apart the loop at the bottom of the earring post; slip this where you closed the wire with the crimp bead. Close the earring post loop and you are done.

If you use left over wire and beads these earrings are very cheaply made and look pretty. Add them as a gift to the tea pocket favors. 


I hope everyone is having a good day or evening where ever you are.


Sunday, 6 December 2015

Useful tips for embroidery


Make your self a merry little Christmas. 24 days of gifts and makes to create a frugal home made Christmas.

DAY SIX:
Best tips for embroidering


Tips

Always wash your hands before beginning to embroider. It is a good idea to plan the sequence of embroidery before you begin, to avoid moving your hand over the finished work as much as possible. I always embroider larger sections first, then fill in with the smaller details. I work from the top to the bottom or from the center outwards.
Take the time to finish off the thread at the back of the work, instead of passing to another area. This will avid shadowing which is very disappointing when the finished work is framed or made up. However, working on very closely embroidered areas you can pass the thread across as it will not be visible.

You may enjoy adding small beads to enhance an embroidery and they can be sprinkled among flowers to form the center of a flower. Small buttons may also be used. Take care to keep the buttons and beads in proportion to the design so as not to distort the dimensions.

Needles 
Any crewel-eyed needle that is the appropriate size for the thread you are using is suitable. Do not use a needle with a blunt point, such as a tapestry needle, on closely woven fabrics.

Embroidery hoop
All work must be done while using an embroidery hoop. To make your embroidery a more pleasant task.

Transfer pencil, dressmakers carbon, or fade/wash away pen


Ideally, you should use some form of washable pen or transfer pencil to draw your embroidery design on your fabric. If these are not available, use dressmaker’s carbon paper to leave an imprint, or simply draw the design onto the fabric using a soft, well-sharpened lead pencil. Often a window during the day can be used as a ‘light box’ to trace off a design with the aid of natural light illuminating the pattern. To work this way, hold the design behind the fabric and press them both against the window while drawing. 
When using a transfer pencil, always work in reverse. The iron should be hot on a dry/cotton. Press but do not rub the iron as it will smudge the transfer.

For free embroidery patterns see:
Q is for quilter

If you scorch your linens:
Removing iron scorch marks


I hope everyone is having a good day or evening where ever you are.

Friday, 4 December 2015

Let it snow ornament


Make your self a merry little Christmas. 24 days of gifts and makes to create a frugal home made Christmas.


DAY FIVE:

This is my take on a pinterest find ornament

Materials:
1 inch square wooden block ( These can be found any craft section and they come in a packet of six)

Two head pins ( These are in the Jewelry making supplies and are the ones with the loop at the end)

 6 Small faceted glass beads in your choice of colors

One large drop bead acrylic or glass

Largish jump rings.

Acrylic gesso in white

Modelling paste (Or texture paste)

Glue gun or strong glue

Glitter.

Acrylic paint:

Black for eyes

White for highlight in eyes

Orange for carrot nose

Blue

Gold pen for lettering and highlighting some of the carrot noses

Flat brush

Fine brush

Palette knife or flat kitchen knife

Flat nose pliers

Method:

Step 1: Paint the wooden block using the Acrylic gesso paint. Let dry.
Step 2: Use a knife to spread on the Modelling paste. Spread it thickly and uneven to look a bit like snow.
Step 3: Take glitter and spread it into the modelling paste around the edges of the block try to keep the snowmen’s faces clear.
Let dry. ( A heat gun works well for these steps). 
Step 4: Use black paint to paint in the eyes.
Step 5: Use dots of black paint to form the mouth.
Step 6: Use triangle shape in orange to paint in carrot nose.
Step 7: Use the gold pen to add in lettering. You can add some black paint to form shadows around the lettering. A black fine tip pen works best for this.
Step 8: Use a fine brush to add in white highlights in the snowmen’s  eyes.
Step 9: Add watered down blue paint around the edges of the blocks and shade in some black paint to add interest and make the snowmen’s faces stand out.
Step 10: Take the head pins and thread on your small faceted beads. Where there isn’t a loop use flat pliers to curve the head pin to make another loop.
Step 11: Use your large jump rings to attach your drop bead. I pulled my jump ring right out and threaded it through the hole at the top of the drop bead and closed it back up. I added another jump ring to use as a hanger. You can also add an ornament hanger to make it look prettier.
Step 12: Find the center of your block at the top and the bottom and using a hot glue gun run a bead of glue around the loop of the head pin to make it stand and stay. Do the same for the bottom of the block. Use your modelling paste and cover the top and the bottom with modelling past to hide the glue. Add glitter if desired.

Step 13: Add a ribbon if desired and hang on tree.


I hope every one is having a good day or evening where ever you are.

Simply colourful


Make your self a merry little Christmas. 24 days of gifts and makes to create a frugal home made Christmas.

DAY FOUR:

Crocheting an edge around wash cloths.


You will need: 
Crochet hook
100 percent crochet cotton yarn
Scissors
Needle

AMERICAN CROCHET STITCHES.
  
Start in the center of your wash cloth. Poke your crochet hook through, grab the thread up and tie off a secure knot (how I start). Put your crochet hook at the bottom of where you tied off and grab the thread with the hook again to make a single crochet.

Chain 2 go back down in your wash cloth and make a single crochet. Chain 2. Repeat around wash cloth to make first round.  When you go around the corners don’t put your stitches too far apart otherwise your stitches on the second round will be pulling. So go a little closer for the corners. The first round is like a blanket stitch to help with the second round.

Close the first round by slip stitching closed.

Second round: Chain three. Double crochet in same space where you closed off the first round. Count first chain three as a double crochet. Make a picot stitch by chaining three and bring crochet down into the top of the first two stitches of the double crochet. YO and pull through the three stitches on hook. This will make a like a little loop at the top and this is called a picot stitch. Go back down into the same space and make two double crochet stitches, this will form a shell stitch. Go down into next space and single crochet. Make a shell in next space: Two double crochet, picot stitch, two double crochet. Single crochet.

Repeat until your second round is finished. Finish off with a slip stitch to close round. Weave in any loose ends with a needle and make sure the ends are tied off securely.

These take no more than an hour to do and anyone can make these. Add bubble bath or soap or perfume or after shave and wrap them up.

SEE ALSO: 


I hope every one is having a good day or evening where ever you are.

(Blog name changed from Vintagepapery to A peaceful homemaker) Linking up to:
Strangers and Pilgrims on Earth

Thursday, 3 December 2015

Banana Muffins


Make your self a merry little Christmas. 24 days of gifts and makes to create a frugal home made Christmas.

DAY THREE:

Banana Muffins


3 cups self raising flour
1/14 cups milk
1 egg, lightly beaten
90 g butter, melted
½ cup firmly packed brown sugar
1 teaspoon ground cinnamon
Chopped walnuts
Vanilla essence

Bananas, very ripe, mashed. Use up to about two or more.

Preheat oven to 180 C. Lightly grease a 12 hole 1/3 cup capacity non stick muffin pan.

Sift flour into large bowl and add brown sugar, cinnamon and stir well. Make a well in center then combine milk, egg, walnuts, vanilla essence, and butter in jug. Add mashed banana with the milk mixture. Pour milk mixture into the well and use a large spoon stir all ingredients until just combined.

Spoon mixture into muffin tray until about three quarters full. Bake for 20 minutes or until a  skewer in center comes clean. Allow to cool in pan and turn out onto a wire rack to cool.

These can be made the day before Christmas or frozen and thawed day before Christmas.

Make them up in a sweet little basket hamper with one of the apple napkins and tea pocket favors. 


I hope everyone is having a good day or evening where ever you are.


Wednesday, 2 December 2015

Pocket favors

Make your self a merry little Christmas. 24 days of gifts and makes to create a frugal home made Christmas.

Day two:

TEA POCKET FAVORS


Materials:
12 x 12 inch double sided scrapbook paper. Or plain card stock. Cereal boxes can also be used for card stock.
For paper you can also use 6 1/2 inch scrap booking paper. Scraps of paper can be glued individually to each square. Christmas wrapping paper can also be used.
Ribbon.
Tea Bag Packet.
Reuse any left over tags, stickers, or old Christmas cards from last year for the decoration.

 Cut 12 inch paper into strips of 3 ¾  width  x 9 ¾ inch long.

Score (fold) at 3 ¼ to make three folds along the 9 ¾ length. The last fold, folds into the card and cut diagonal to make the pocket. Run a bit of glue along the bottom of the diagonal cut to form the pocket. If you are using scraps of paper that aren’t quite long enough glue these down to your card stock before you cut your pocket. Now you can decorate the front. Glue down the ribbon leaving enough ribbon to tie off. Then add your decorations on top of the ribbon.


A sentiment can be stamped or cut from old Christmas cards and placed inside. Add your tea bag packet.
Small gifts can also be added behind the tea bag packet. This favor can be tucked into a mug with a treat as well.


The tea pocket favors can be decorated in any style and any color to personalize each one.


I hope everyone is having a good day or evening where ever you are.

Monday, 30 November 2015

Merry Makes


Make your self a merry little Christmas. 24 days of gifts and makes to create a frugal home made Christmas.
  
DAY ONE:

Apple Napkins


Materials:

Fabric Paint:
Green Paint
Red Paint
Dark Red Paint
Brown Paint
White Paint

I used acrylic paint and Jo Sonja’s Textile Medium.


Flat Sponge (Type used for washing up)

Fabric at least 16 ½ inches square. You can use pre-made napkins. I used old sheets, Pillow cases, table cloths, from other projects for my napkins.

Small paint brush to add highlight.
Medium stiff paint brush to paint colours onto sponge.


Fray edges of napkins and Top stitch around the napkins using sewing machine or hand stitches. The Top stitch is like a seam but without turning under any edges. It will stop the napkins from fraying further when washing.

Use the template to cut out your apple shape. (Always be careful when cutting). Cut away all the sponge you don’t want to paint.
I painted my apple leaves green. The stem brown. I then painted the apple in a dark red. Then I used a light red to sponge over the top. Lastly I added in a highlight in white. Iron and wash, then iron again.
Template to cut your sponge

They are very easy to make and you can whip up two, four, or more in no time.

Add your favourite recipe card and a wooden spoon, tie up with twine and they make a really nice gift too.

See also:
Serviette Rings from a paper roll

The graceful and peaceful home


home made wrapping paper

I hope everyone is having a good day or evening where ever you are.


Sunday, 29 November 2015

New Blog name: A Peaceful Homemaker


Summer is making it's presence known even though summer hasn't yet officially arrived. There have been late afternoon storms with not much in way of rain. The surrounding towns around us have had a few wild storms but our town hasn't received anything to speak about. The heat is defiantly here though. 


I've been pottering around at home trying to stay cool. I started up embroidering a pair of pillow cases from a set of vintage embroidery designs I have. The pillow cases are thrifted and cost a dollar for the pair. The vintage designs came from a lot on Etsy and cost very little as it wasn't a complete set. I coloured the bows in using Crayola crayons and they cost about $3 a packet. To learn more about crayon tinting embroidery I have a lesson: Introduction to crayon tinting.
I think these pillow cases will be a very pretty and frugal make when finished. 

I've also made a slight change to my blog. I've been at my blog now since 2012 and used Vintage Papery for that long. My blog originally was just going to be used for paper crafting, over the years the focused has changed towards more home based living and crafting. I still do paper crafting but not as much. I think this blog has out grown the name Vintage Papery and was time to change the name.

All this means is I decided to have a different blog name to be more about the post I currently do. My blog is now: A peaceful Homemaker and the URL is: http://www.apeacefulhomemaker.blogspot.com.au/
I will have to change my links below the banner so they will link properly. 

If you have been following me under Vintage Papery, you'll probably have re-follow me under a peaceful homemaker for my posts to show up on your feed.

I thought it much better to change the url than start up a whole new blog.  I think the new name suits now. 


I hope every one is having a good day or evening where ever you are.


Thursday, 26 November 2015

Creating at home


The weather has been hot and outside is not really the best place to be. Although I did venture to town to have a look at the CWA mini market. Surprisingly I never brought anything, probably because I have been working on projects at home. I did enjoy having a browse through the tables.
I've finished up face washers for my driving instructors mum who wanted them for the grand kids. We picked up a dozen cute face washers for next to nothing and the yarn cost very little, around $4. I don't know about anyone else, but I always liked a face washer and a  piece of soap for a gift. Very useful I think. I'll give the instructions for the edging in another post. Speaking of driving, apparently I can try for my drivers licence in February.  Where did the year go?


With the projects I had to do, I haven't had much of a chance to catch up on sending out my mail. I've received some fantastic letters from around the world: America, Canada, Hungary, and here at home. I really enjoy snail mail, does anyone else send letters?


I've also been neglecting my painting, the last art I did was these miniatures for necklaces. It's time to pull out the paints again.


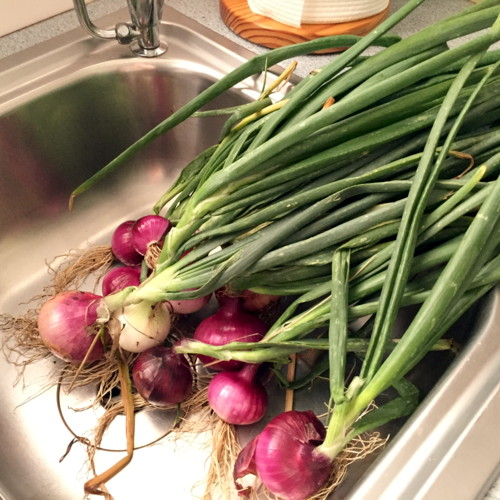
In the garden, we've had a bumper crop of red onions. I think it's time to try out red pickled onions.   


I hope everyone is having a good day or evening where ever you are.


Sunday, 22 November 2015

Sweet and Simple things


Summer is definitely approaching, we’ve had some hot days and late thunder storms. All of which seems to be adding up to a very hot and wet summer. The hot days have been good for drying tea towels. 

On Saturday I attended the last event for this year of the Simple Living Toowoomba group. There were plenty of workshops to entertain the small group that arrived for the day and there was enough breeze blowing through the open hall doors to keep the heat away. 

We were taught how to make gift bags from paper. And there was lessons on how to make a reuse able gift bow. Nanna Chel has the instructions over at her blog: Going Grey and Slightly Green. 


There was also lessons on how to make some easy felt ornaments. Which I really enjoyed making.The felt ornaments look sweet on a little table top Christmas tree. I intend to make more to send in snail mail.


After the workshops we had our secret Santa. 
I come home with a rocket plant and a knitted dishcloth in a gorgeous shade of green, the yarn was made from some kind of recycled fabric and dyed. Lovely. Dad loves Rocket so it is now planted happily in a new home in the garden.

The day was really enjoyable and I  learnt  new things for the home. I am looking forward to next years events.


I hope every one is having a good day or evening where ever you are.

Sunday, 15 November 2015

Vintage hat potholder


 Crochet Hat Potholder:


Super cute and easy to make. These do up quickly and would make a very nice gift for Christmas when added with tea towels. You could also stuff the hat with potpourri and make as a hanging sachet for your linen cupboard.

4 Ply  100% Cotton (Lincraft in Australia has a 100% crochet cotton in 4 and 8 ply brand using their name 'Lincraft' and is reasonably priced. It is the brand I used.)


Chain 4. Form into ring.
Chain 1
12 double crochet through centre of ring.
 (Pull tail to make centre smaller).
Sl St to close round.
Chain 1
Half double crochet into Sl St.
One half double crochet in every stitch.
(Turn out to form crown of hat) Sl St round closed.
Chain 1

Half double crochet . Sl St round closed.
double crochet x 4 in same stitch around row.
Sl St round closed. Chain 1.
Double crochet x2 in same stitch. Sl St closed.

Tie off and weave in ends.
Weave yarn between the last half double crochet and double crochet to make a ribbon for the hat.

Tie off into a bow. Add a rosette flower if desired.


I've also decided to start making printable pages of my blog posts from the lessons, tips and recipes! Save these and print them out, then add to your home keepers binder. Click on the image and it will go to the original size. Right click, save, and print off when you need it.

Blue Geraniums - Rozanne

I hope every one is having a good day or evening where ever you are.


Link Up
Strangers and Pilgrims on Earth